How to Restore Photos/Library from Time Machine
"I found that I have deleted some important photos on Mac, but I cannot remember if I have backed up them with Time Machine. How I can find the possible existing backup and restore photos from Time Machine?"
How do you feel when discovering that your precious photos on your Mac got deleted or lost? Something like a sharp pain cut through your heart, right? Not to worry though, Mac computers are equipped with Time Machine to help you restore photos and save you from the unpleasant feeling of losing photos, or worse, the whole photo library. This article provides a detailed step-to-step guide on how to restore photos from Time Machine, and also provide an alternative solution if, unfortunately, Time Machine was not enabled. Do you want to be in the know? Read on!
Restore Photos/Library from Time Machine Backup
If you have had Time Machine on when deleting photos, things become easier to restore your photos/library on Mac as Time Machine automatically stored a backup of your data. So long as you have a backup, your information is safe and secure. And the best way to ensure recovery success is to retrieve the entire photo library.
Easy Guide to Restore Photos from Time Machine Backup
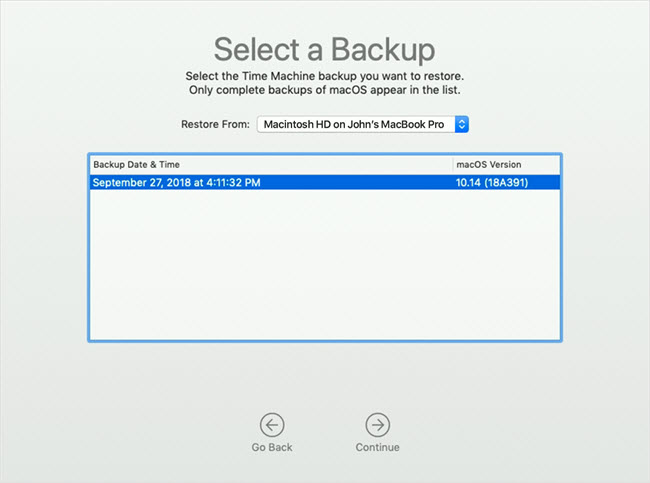
Launch Time Machine, either by clicking the Time Machine icon in the menu bar and choose Enter Time Machine; or to open it from Applications folder.
Navigate to Pictures folder.
Select the date of your last backup and then find backup of your photos or photo library.
Click on Restore.
Wait patiently as it may take some time to restore your photos/photo library depending on the size of your file. If this is successfully done, you should be able to use your photos in the state as it was during the last backup.

Recover Photos/Library by AnyRecover without Time Machine Backup
It is not a surprise that so many individuals forgot to backup deleted photos/library, or they are just ignorant of the benefits attached to do so. In such circumstance no backup data is available, thus restoring from Time Machine is impossible. Assuming this is the case, we suggest making use of reliable third-party software to restore photos and photo library from Mac, the best of such is iMyFone AnyRecover.
This is enhanced software that helps in the recovery of any lost or deleted data on your storage device. It is compatible with both Windows and Mac devices, and AnyRecover for Mac version supports operating systems from Mac OS X 10.9 to Mac OS X 10.15. This software also possesses an advanced deep-scan algorithm that ensures a high recovery rate.

1,000,000 + Downloads
Features of iMyFone AnyRecover:
It is adequate for recovering photos/pictures from SD card, USB flash drive, digital camera and other various storage devices.
AnyReocver will efficiently recover photos lost due to scenarios like deletion, hard drive failure, virus attack, formatting, etc.
It is able to recover 1000+ file types, including photos, videos, documents, emails and more.
AnyRecover promises 100% security, it is also very easy to use.
Easy Steps to Restore Photos/Library with AnyRecover
Recovering photos/library on Mac with the AnyRecovery software is not a Herculean task provided you follow the detailed guideline below.
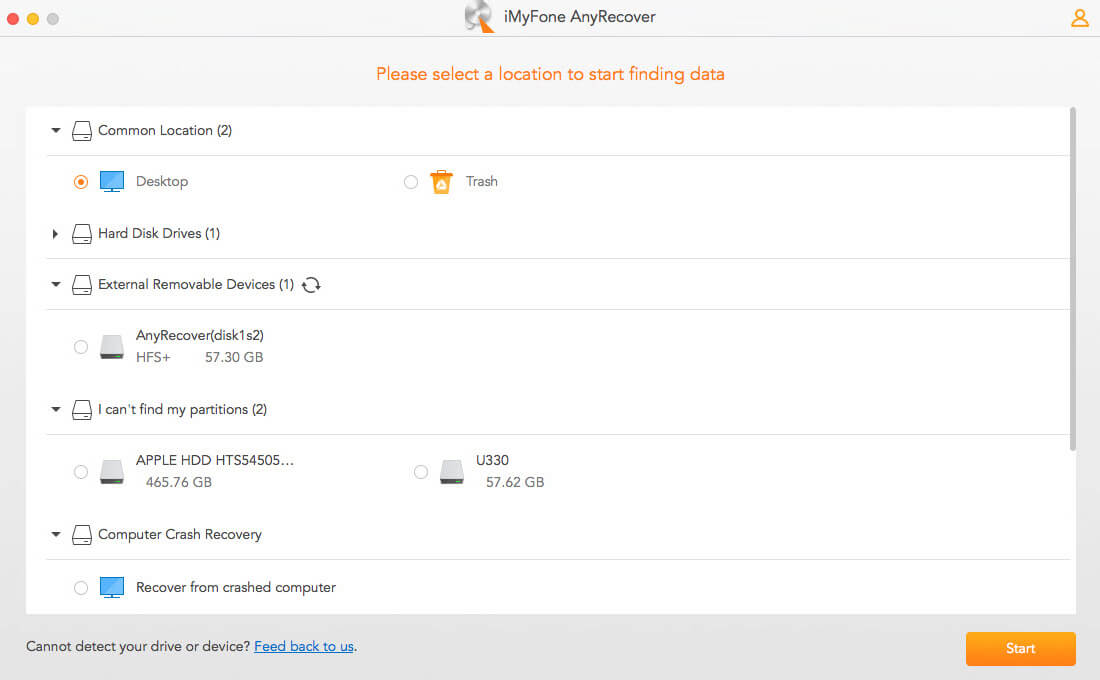
Step 1: Select a location. Choose the location where you had lost the photos, like in Hard Disk Drive, then click on Start.
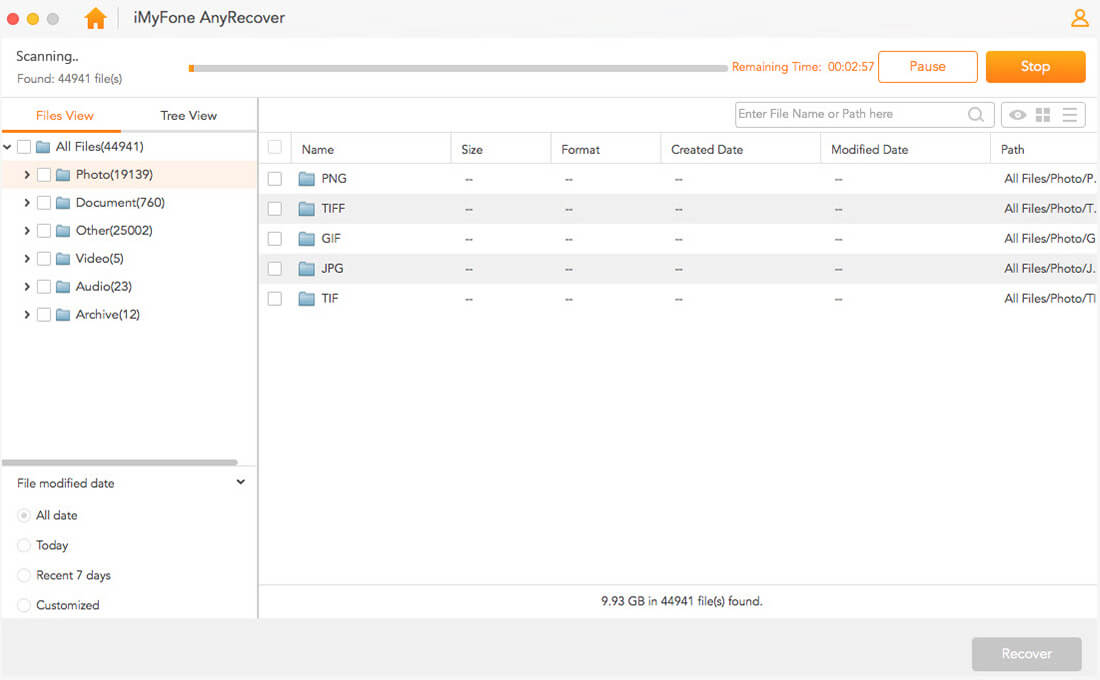
Step 2: Scan the chosen location. AnyRecover will scan the desired location, you may pause to identify the targeted photos or stop the scanning process.
Step 3: Preview and recover photos. The lost photos will be arranged in lists. Decide on the exact photos you want, and click on them to Preview. After making your selection, click on Recover to get all the photos back.


Bonus tips: How to Backup Photos and Photos Library
The importance of backup for your relevant photos/library cannot be over-emphasized; here are three ways to create a backup of your photos and photos library.
1Backup Photos with iCloud
When you store your images on iCloud, you can access them using either your Mac, PC, iPad or iPhone.
1. To back up using iCloud, first sign in with your Apple ID and turn on iCloud Photos.
2. On the Photos app, choose Photos and then Preferences, click iCloud.
3. Check on iCloud Photos.
2Backup Photos/Library with Time Machine
1. Connect an external hard drive to your Mac, such as USB or flash drive.
2. A window might pop out to ask if you want to use the drive to back up with Time Machine, choose Use as Backup Disk.
When Time Machine is turned on, it automatically maintains backup of your files.
3Back up Photos to External Hard Drive
This is easily done by manually copying the photos and photo library to your external hard drive. But you need to frequently update it because it won’t include the latest photos.
Concluion
Photos are important to us because they carry precious memories; however, sometimes they may get lost due to one reason or another. If you are conscious of performing a backup of your photos/library, then it is convenient to restore photos from Time Machine. On the other hand, if you have difficulty retrieving your photos/library as a result of your failure to create a backup, the use of iMyFone AnyRecover for Mac software will be your best rescue to recover deleted/lost photos efficiently.
Time Limited Offer
for All Products
Not valid with other discount *

 Hard Drive Recovery
 Deleted Files Recovery


