 Hard Drive Recovery
 Deleted Files Recovery
-
Get Started
- Recover from Computer
- Recover from Recycle Bin
- Recover from External Devices
- Recover from Lost Partition
- Recover from Crashed PC
-
Recover from iOS devices
-
Recover Line App Data
-
Recover WhatsApp Data
-
AI Repair
- Recover from Android
Brief Introduction
Anyrecover is different from any software on the market. It is an all in one data recovery and fire repair software.
Just by downloading one software, you can recover data and repair files from 200+ types of devices, including Windows, MacOS computers, hard drives, iOS devices, SD cards, cameras, external storage devices, etc.
Secondly, we can recover 2000+ file types, like jpg,jpeg,png,mp4,mp3,elxs and so on.
What's more, it also comes with currupted file restoration, photo and video clarify and enhancement.
Choose Anyrecover and you can easily retrieve your lost files in 3 simple steps. Let's learn how it works now.
![]() Note:
Currently anyrecover does not support data recovery from Android devices (it is expected that we will be compatible with Android data recovery in January 2024). If you need it, you know AnyRecover for Android.
Note:
Currently anyrecover does not support data recovery from Android devices (it is expected that we will be compatible with Android data recovery in January 2024). If you need it, you know AnyRecover for Android.
How to Install AnyRecover
The download and installation of AnyRecover fullkit version are simple and easy. Get the simple steps here.
1 System Requirements
AnyRecover is a desktop software that supports Windows and Mac system computers. (Although we also have an app for iOS, the function of the app is single. For your better experience, it is recommended to download the desktop software.)
Learn more tech information, pls visit: https://www.anyrecover.com/reference/
2 Downlaod AnyRecover
AnyRecover comes in Windows and Mac versions. The download button below will download the link according to the system configuration of your current computer. Click the button to download.
3 Install AnyRecover
Step 1. Double-click the “anyrecover-for-win_setup” file in your downloaded folder.
Step 2. Click “Install." A dialogue will appear to ask for an installation confirmation. You can also click “Customize Install” to select your preferred language and destination.

Step 3. Click “Start Now." Wait for a few minutes, and an ending dialogue will appear. Then you can choose the correct function bar to begin your recover tour with AnyRecover
![]() Note:
To launch AnyRecover Data Recovery, simply double-click the "AnyRecover” icon on the Desktop.
Note:
To launch AnyRecover Data Recovery, simply double-click the "AnyRecover” icon on the Desktop.
How to Register AnyRecover Account
AnyRecover allows you to scan and preview data stored on your computer or storage devices for free. But if you want to recover and save the lost or deleted files, please register and upgrade first.
If you are already a user of Anyrecover products. In that case, you can directly log into AnyRecover ID.

If you are a new user, follow the steps below to register an AnyRecover ID.
Step 1. Click account icon > Sign Up > Create an account to go to the registering page.

Step 2. Input your email, password, and name. After that, click “Create Account” to finish the registration process.

Buy Any Recover Vip Benefit and Enjoy Full Version
You can check our pricing by visit: https://www.anyrecover.com/buy/buy-data-recovery/ . At the same time, we provide many ways for you to upgrade to a VIP privileged user.
Way 1. You can click the "Buy Now" icon on the top of Anyrecover software to view the price and plan.

Way 2. Launch Anyrecover software, click account icon > choose your plan > click "Buy Now" button

Way 3. Click account icon > More Products > Go to AnyRecover Member Center> Choose recovery solution > click "cart" button > Click "Buy Now"


How to Recover Files from Computer
To recover data on a computer, please follow these 3 steps:
- Select a location
- Scan the location
- Preview & Recover
Here is the video guide for you, if you need text guide, skip video tutorial to next part would be ok.
Step 1: Select a Location
After entering the "PC and hard disk data recovery " module on the top bar, then select the location to restore data to begin data recovery.

Can't find my partition: You can try to scan from "Can't Find Location". All your hard disks and partitions will be displayed here, and you can also perform a full disk scan here.

Step 2: Scan the Selected Location
The scanning methods include quick scanning and deep scanning. The scan time depends on the size of your partition and the number of files. You can downclick to preview the scan results.

Faqs: Can I Pause or stop the scanning process?
Yes. Click the "Pause" button in the top-right corner to suspend scanning; resume scanning by clicking "Continue".
If you have already found the files you need, click the "Stop" button to terminate the process, after which you can recover all scan results or choose files to recover.
Also, you can use the search and filter functions to find the files you want to recover more quickly.

Step 3: Preview and Recover Lost Files
When the scanning is completed, all files will be neatly listed. AnyRecover allows you to preview the files and recover them selectively.
Locate the files
You can toggle between "File Type" and "File Path" to quickly locate the files you need. File Type refers to the types of data; File Path is the route on your computer that once stored the data.
Preview the files and recover
Double-click on a file and a pop-up window will appear that lets you preview the content. If that's the file you need, click the "Recover" button. Then your recovery will be finished.

![]() Note:
1. Some files cannot be previewed, but this doesn't mean they can't be
recovered, pls go ahead and recover them to check their content.
2. You can recover multiple files by ticking the each file's check box, then clicking the
"Recover" button and choosing a location to save the
recovered files.
3. DO NOT save the recovered files to the file location where you lost the
data. Save it to a new folder.
Note:
1. Some files cannot be previewed, but this doesn't mean they can't be
recovered, pls go ahead and recover them to check their content.
2. You can recover multiple files by ticking the each file's check box, then clicking the
"Recover" button and choosing a location to save the
recovered files.
3. DO NOT save the recovered files to the file location where you lost the
data. Save it to a new folder.
If you don't want to restore the scanned data right now : you can choose to save it. Next time you can import the scanned file and directly restore the data, saving the time of scanning the same data again. Here are the steps on how to import scan results to continue recovery.

The main interface shows the scanned data . Click "Import Scan Result" to enter the next interface.

Then you will see the saved scan result will be displayed in a list. If you do not find the scan result file you want in the current list, you can browse and locate the saved scan file by yourself through "Browse file".
Note*:
1. If the scan result file has not been saved, it won't be displayed;
2. If the scan result file is saved in an external storage device, when importing the scan result file, make sure that the external storage device is connected.

How to Recover Files from Emptied Recycle Bin
Video Tutorial on How to Recover Files from Emptied Recycle Bin
Step 1: Select the Recycle Bin
To restore deleted data from the Recycle Bin or restore the whole emptied bin, choose the “Recycle Bin” option on Windows, or "Trash" on a Mac.

Step 2: Scan the Recycle Bin
After clicking on the location, all-round scan will work to search for lost files. You can pause or stop the scanning process at any time; the software will also remind you when the scan is complete.
Step 3: Preview and Recover Files
When scan is finished, all scan results will be displayed. You can double click on a single file to preview and recover it. Alternatively, you can select all files in scan results.
How to Recover Data from External Devices
This part is suituable for the data recovery of SD card, USB drive, external hard drive, memory card, digital camera, and so on.
Step 1: Connect the External Device
Start by connecting the external device to your computer; make sure that it can be detected.
Step 2: Select the External Device
Select the device from which you want to recover data, then hit on it to begin the recovery process.
Step 3: Scan the External Device
An all-round scan will be conducted on the selected external device; the overall scanning time depends on the size of the data and performance of your computer.
You can also choose to pause or stop the scanning at any time.
Step 4: Preview and Recover Files
Once the scanning process is finished, you can choose the targeted files from the scanning results and preview them before recovery. To get these files back, click the "Recover" button and select a safe location in which to save the files.
How to Recover Data from Lost Partition
Need to recover data from a specific partition? No problem, AnyRecover is here to help, just follow the 3 steps below to retrieve lost data in no time.
Step 1: Select the Drive
To get data back from partitions, select the drive you want to recover from under the "Can't Find Location" tab.
Step 2: Check for Partitions
Then you need to select the drive and clicked on the "Scan" button, AnyRecover will list all the partitions found in this drive.

![]() Note:
You can select only one partition for recovery at a time.
Note:
You can select only one partition for recovery at a time.
Step 3: Scan the Partition
Select the partition from which you want to recover data, then click on the "Scan" button. It will take some time to finish the scanning process.
Step 4: Recover Lost Files from Partition
Once the scanning ends, double-click a file to preview and recover it. Alternatively, select multiple files or recover all files are worked.

How to Recover Data from Crashed Computer
If your computer had crashed or is not able to boot up in an ideal way : AnyRecover can also help you create a bootable drive so that you may recover data.
Step 1: Preparation for Computer Crash Recovery
- Another working computer
- A blank USB drive or CD/DVD
Step 2: Create Bootable Media
Make sure that you've connected the USB drive or CD/DVD to the working computer and that it can be recognized, then let's start.
1. Start Computer Crash Recovery

2. Create a Bootable Drive Successfully
Select the drive you want to use to create a bootable drive, then click "Create" to begin.

A message will pop up alerting you that this operation will format your drive. Make sure that you've backed up your important data, then click "Format".
The program will start to download firmware. Once done, it will begin to format the USB drive or CD/DVD and create a bootable drive after that.
3. Boot Up the Crashed Computer
Once the bootable drive has been successfully created, follow the steps below to restart your crashed computer.
- Adjust BIOS to boot from USB flash drive or CD/DVD.
- Connect USB flash drive or CD/DVD to your crashed computer.
- Restart your computer.

Step 3: Recover Data from Crashed Computer
By following the steps above, your crashed computer will become bootable now. You can then recover files from the computer with AnyRecover data recovery tool.
Recover data from iPhone/iPad
Is your iPhone damaged or locked by a forgotten passcode? Lost iPhone data due to accidental deletion? With four recovery modes, AnyRecover is specially designed to recover your lost files from iOS device or iTunes/iCloud backup no matter how you lost them.
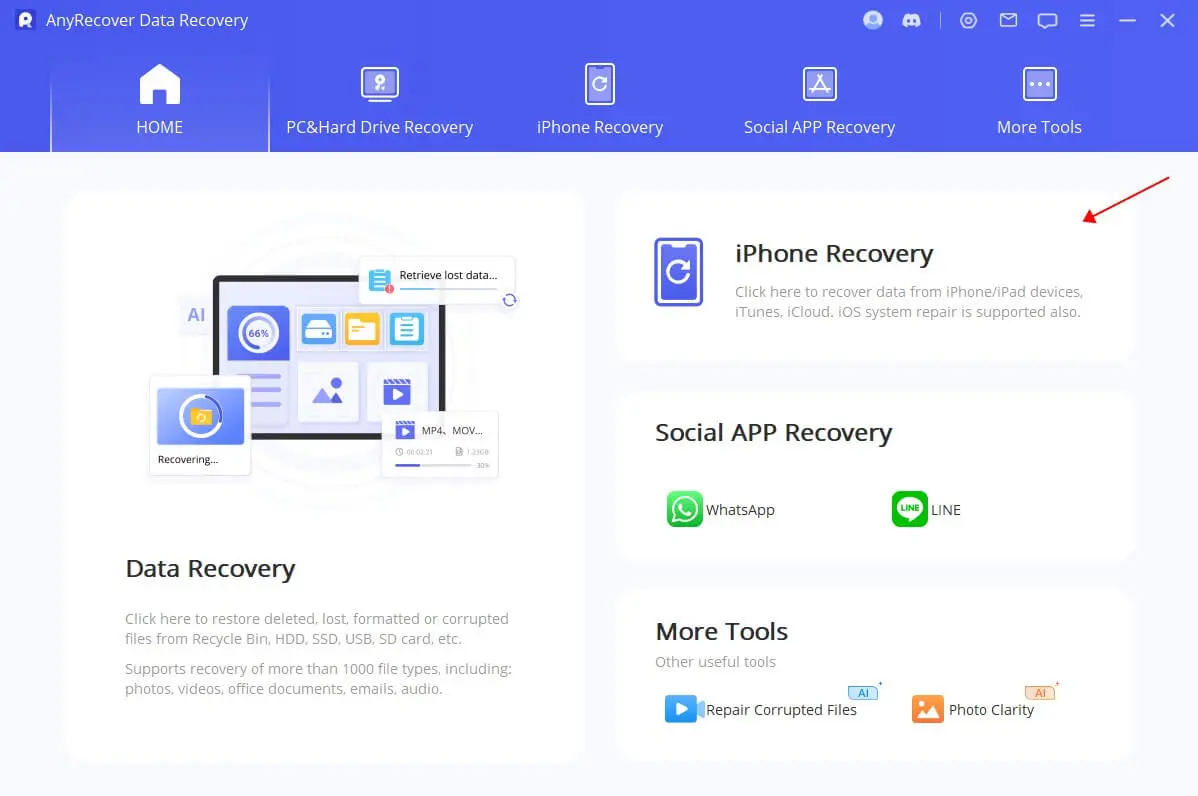
After launching AnyRecover, you can directly select and enter the "iPhone Recovery " on the main interface or the top navigation bar.
Mode 1: Recover from Device Directly
Step 1: Connect and Scan Your iOS Device
After launching data recovery software, choose the Recover From Device module.
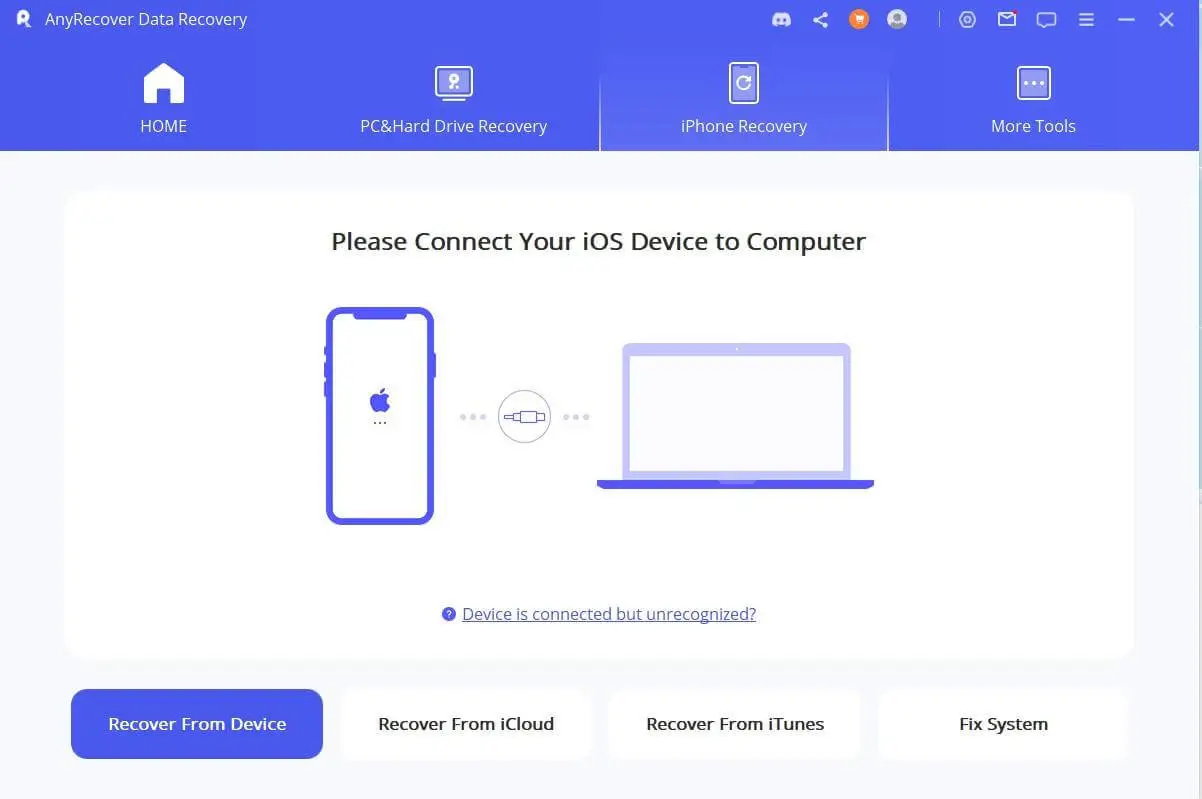
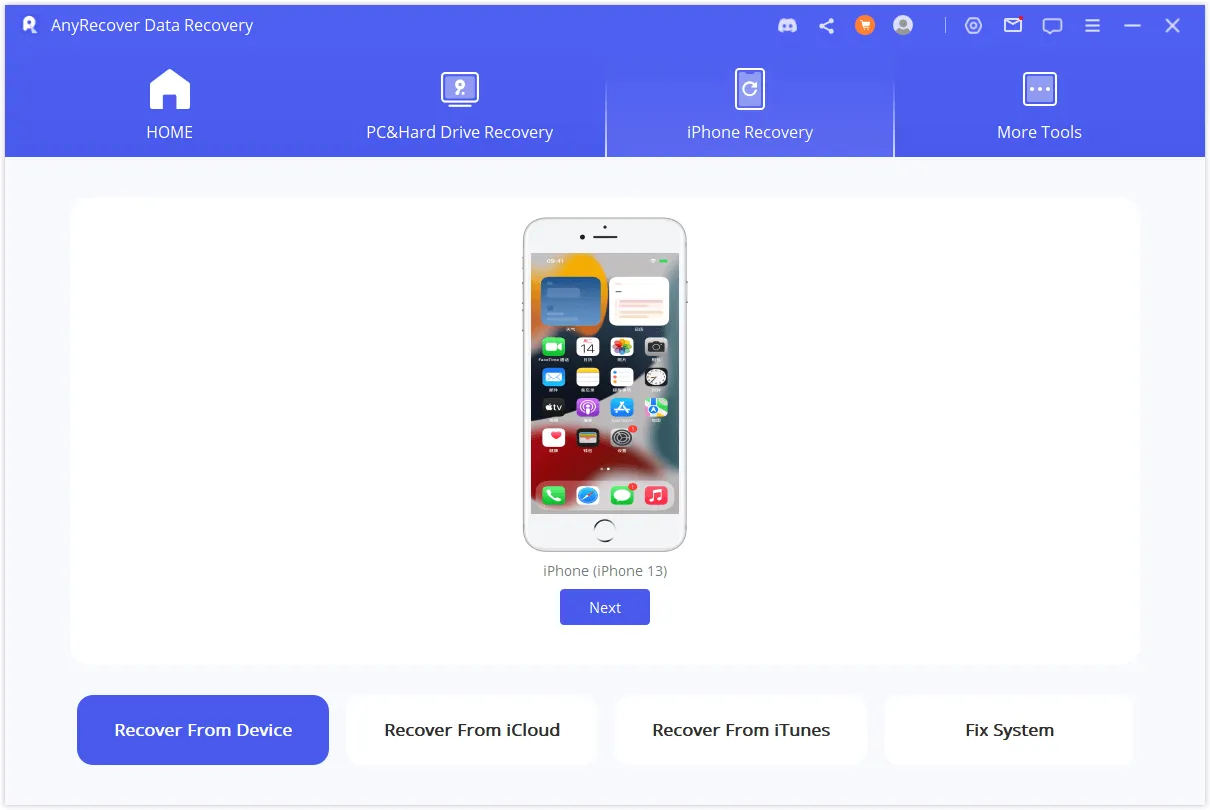
Connect your device to your computer. When the program successfully detects your iDevice, click Next to proceed.
Now, select the types of files that you would like recover. After that, click "Scan". The program will start to look for the deleted data from your device.
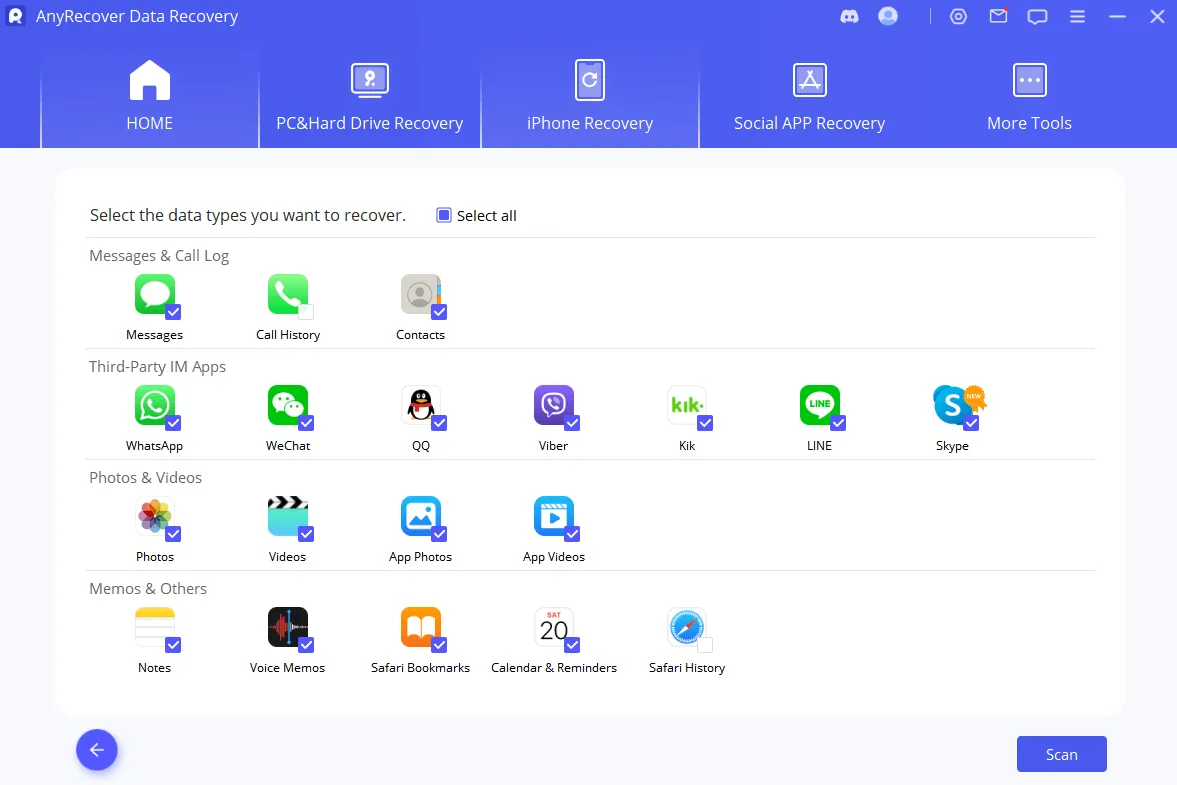
Step 2: Preview and Recover Data
After the scan is finished, all recoverable data will be clearly organized as the picture below shows. Click each tab to check all files. To find data that you would like to recover accurately and quickly, click on the funnel icon in the upper right corner to select the file status and dates.
Recover to ComputerIf you want to recover to your computer : select the files which you want to recover, and then click "Recover to Computer" at the bottom right corner.
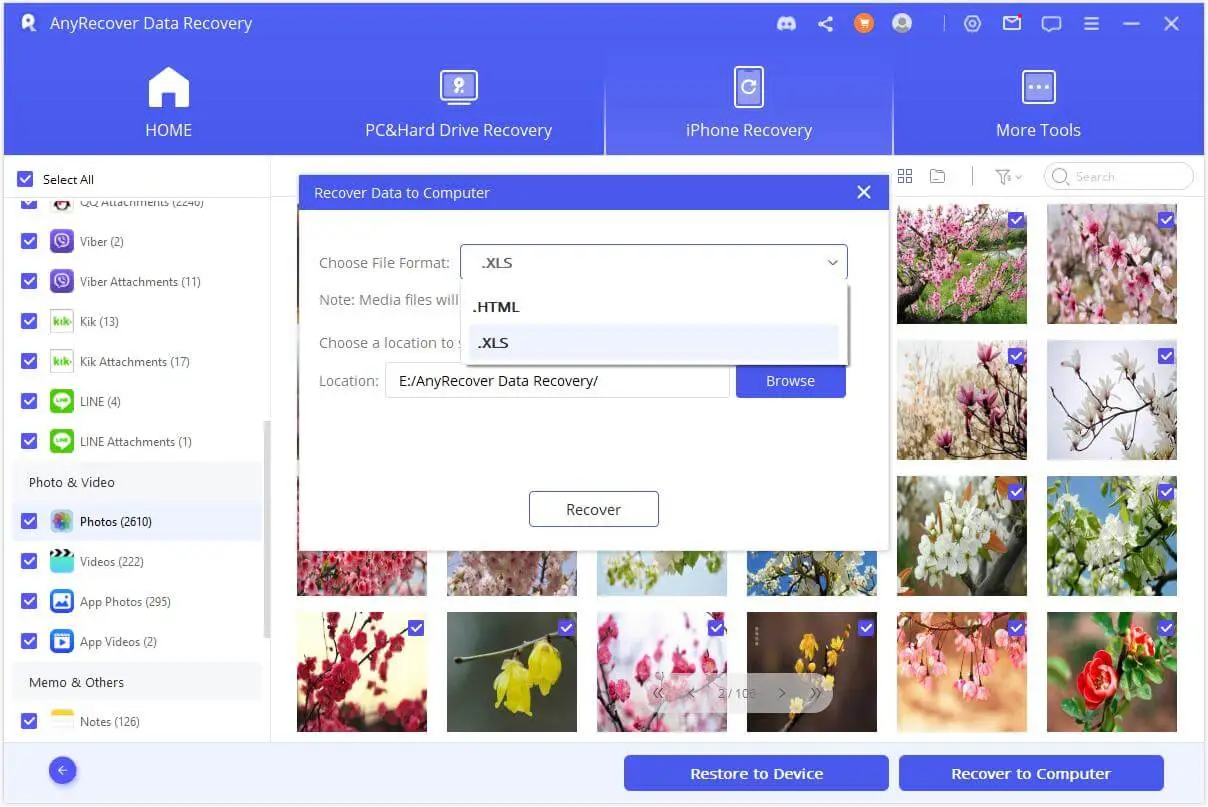
A pop-up window will display to let you choose the location to store the recovered files and it will take only a few minutes to finish the recovery.
Restore to DeviceIf you select "Restore to Device" : you need to make sure your iPhone is detected by the computer. Then click "Next" button
Please note that you need to ensure that the device has enough space to accommodate the restored data, otherwise the restoration will fail.

Now the program will start the recovery process.
![]() Note
The program
only supports to restore backup to a device running same or newer iOS versions.
You can upgrade the device to the latest iOS version and try again.
Note
The program
only supports to restore backup to a device running same or newer iOS versions.
You can upgrade the device to the latest iOS version and try again.

Shortly, your data will be recovered to your iPhone.

Mode 2: Recover Data from iTunes Backup
Step 1: Choose and Scan from iTunes Backup
Choose the iTunes backup you want to restore and click Next. For encrypted iTunes backups, you need to enter the iTunes password.
![]() Notes:
AnyRecover supports scanning out the iTunes backups that you've made
through other programs on your current computer, and these types of data can
also be recovered.
Notes:
AnyRecover supports scanning out the iTunes backups that you've made
through other programs on your current computer, and these types of data can
also be recovered.

Select the file types you need and click "Scan" button. Please wait a moment while it scans.
Step 2: Preview and Recover Data from iTunes
The search results will be showed on the interface clearly. To find data that you would like to recover accurately and quickly, you can click on the funnel icon in the upper right corner to select the file status and dates.
Recover to ComputerIf you want to recover your data to your pc : select the files which you want to recover, and then click "Recover to Computer" at the bottom right corner.
You need to select or create a folder as the recovery path. Then AnyRecover will recover the data to the folder and you can check it after finishing the recovery process.
Restore to deviceIf you select "Restore to Device" : you need to connect your target device. Then tap on the "Next" button.
Now, the program begins to recover your data, please note that the original data in the device will be overwritten.

After a few minutes, your data will be recovered to your device successfully.
Mode 3: Recover Data from iCloud
There are two options to recover data from iCloud:
1. Recover from iCloud account
2. Recover from iCloud backup
If you have enabled iCloud and signed in iCloud account on iOS devices, your data will be automatically synced to iCloud Kit. Or you may have manually backed up your data to iCloud. Choose the suitable option below to get your data back from iCloud.
Option 1. Recover from iCloud Account
Step 1: Log in iCloud Account and Scan Data
Choose "iCloud" from "Recover from iCloud" module.

Fill in your iCloud account details. Please be assured that AnyRecover will never keep a record of your iCloud account info or content.

For this part choose to recover one or more categories from iCloud account including contacts, photos, notes, iCloud Drive and iWork files. And then tap "Scan" on the lower right corner.

The scan will be in process, it might take some time depending on the file size. Please kindly wait.
Step 2: Preview and Recover Data from iCloud
After the scan is completed, the search results will be clearly organized on the interface. You can preview files which you want and then click "Recover".

Last, choose a location on your computer to store the recovered data. Please don't exit program while AnyRecover is recovering your lost data.
Option 2. Recover from iCloud Backup
Step 1: Choose iDevice Status
Choose "iCloud Backup" from "Recover from iCloud" module.

Step 2: Choose the type of iPhone
Choose the instruction according to your iDevice status.
Option1: An iPhone in initial setup

Follow the instructions to restore the iCloud backup to the device, and then connect the device to the computer for scanning


Option 2: A currently using iPhone with data

Since restoring factory settings will erase all data on the device, users need to choose whether to back up device data. Click "Skip" if NO backup need is required.

After the backup is complete, the program will start to reset the device, after confirming the reset, click "Start".

To prevent encountering Activation Lock in a later step, after the user chooses to start reset, the program retrieves whether Activation Lock is turned off on the user's device. If not closed, a prompt page will pop up.

After the reset is complete, the user can operate step by step according to the prompts.

Mode 4: Fix Various iOS Issues
If your device is stuck on various iOS issues : you should use the Fix iOS System solution. There are three methods offered in this mode for resolving iOS issues.
Standard Mode - Resolve common iOS issues including white screen/Apple logo/recovery mode, restarting loops, iTunes errors, bricked iOS devices, freezing screen, not turning on, and more without data loss.
Enter/Exit Recovery Mode - Recovery mode can be entered or exited with one click without any device operations.
Advanced Mode - It can be used if Standard Mode is unable to resolve iOS issues or you have forgotten your device passcode.
![]() Note:
1. When you use this feature, your device will be updated to the latest
iOS version.
2. The jailbroken device will be restored to its default state.
3. Your device will be unlocked if it has been locked before.
Note:
1. When you use this feature, your device will be updated to the latest
iOS version.
2. The jailbroken device will be restored to its default state.
3. Your device will be unlocked if it has been locked before.
1. Use Standard Mode to Fix iOS Issues without Data Loss
Step 1: Connect your device to a computer
Choose "Standard Mode" and connect your device to the computer with a USB cable. Click on "Next" to continue.


If your device is not recognized by Anyrecover : you can follow the instructions to place it in DFU or recovery mode.

Step 2: Download Firmware
After entering DFU Mode or Recovery Mode, you need to download the updated firmware. The program will detect your device automatically and recommend the appropriate version for you.

Step 3: Fix System with Firmware
When you have downloaded the firmware, click Start to Fix to verify it. Then Anyrecover will start fixing your iOS automatically.
![]() Note:
If your device is out of DFU/recovery mode in this step, you have to
repeat step 1 and put your device in DFU/recovery mode again.
Note:
If your device is out of DFU/recovery mode in this step, you have to
repeat step 1 and put your device in DFU/recovery mode again.

It might take some time to complete this process. Please wait patiently.

After the fixing process is finished, remember to check whether your device can start. Please try again if the device does not start.

If the fix fails, you can try again in Standard Mode or Advanced Mode.
Enter/Exit Recovery Mode
Step 1: Connect Device to PC
Select Enter/Exit Recovery Mode and connect your device to the PC.


Step 2: Choose Mode According to Your Situation
Select Enter Recovery Mode/Exit Recovery Mode depending on your situation. Wait for a while, and you device will start successfully.
![]() Note:
In case the exit process ends but your device can't start, please try
again or use Standard Mode to exit Recovery mode.
Note:
In case the exit process ends but your device can't start, please try
again or use Standard Mode to exit Recovery mode.

Advanced Mode
Before you use this mode, you should know that Advanced Mode will reinstall iOS completely and all the data on your device will be erased.
Step 1: Connect Device to PC
Choose Advanced Mode on the screen and connect your device to your computer.


Step 2: Download Firmware
Now you should download the firmware by clicking Download button. Anyrecover will detect your device automatically and recommend the appropriate version for you.
Step 3: Start Fixing System
After you have downloaded the firmware, tap on Start to Fix to proceed.
Wait for a while and the fixing process will be done.
LINE Recovery
Are you losing LINE data on your device? There is no need to be worried. With AnyRecover, you can quickly recover your lost LINE data on iOS and Android devices in 4 ways: from Device Storage, from Google Drive, from iTunes.
After launching AnyRecover, you can directly select and enter the "LINE Recovery " on the main screen.

Mode 1: Recover from Device Storage
Step 1: Connect Device to Computer
Select Recover from Device on the main screen. Then connect your phone to the computer with a USB cable and click Start.
Step 2: Scan and Recover LINE Data
The scanning process differs between Android and iOS system.
- For iOS:
Click Start to begin the data scan. When the scan is complete, browse for data that can be recovered. Select Recover to Device or Recover to PC. .

If you choose “Recover to PC” : please select the format and location to store your data. If you choose “Recover to Device”, please ensure that you are logged into the same LINE account and wait for the recovery to be successful.

- For Android:
After your phone is recognized by AnyRecover, you have to select methods of recovery. The Shallow Recovery is faster. It will scan your photos, audios and files to PC. And the Deep Recovery will scan chats, photos, videos, audios, contacts and files and then recover them to PC or to your devices.
If you choose Shallow Recovery : After scanning the data, you can see the photos, files, etc. that you can recover and click on Recover to PC. You can choose where to save them here.

If you choose Deep Recovery : After setting up your phone and backing up your data to Google Drive as instructed in the product interface, an older version of LINE will be automatically installed on your Android device (don't worry, this step will not affect your existing LINE data).

Then back up your LINE data on your device to your phone's local storage. You can set the password to encrypt the backup, wait for AnyRecover to retrieve your LINE data and enter the same backup password there.

To successfully transfer all LINE data, AnyRecover will automatically download the iTransor Assistant application. Once the installation is complete, please follow the prompts to Settings > Applications > iTransor Assistant to enable access to your storage device and then click Done on the PC.

The latest version of LINE will then be reinstalled for you and you will have to wait for the installation to complete before logging into the same account on LINE on your device.

You can preview the data by type and select the data you want by choosing Recover to Device or Recover to PC.

Wait for the recovery process to be completed.

Mode 2: Recover from Google Drive Backup
Step 1: Login to Google Drive and LINE Account
Launch AnyRecover and select Recover LINE data from Google Drive. Sign in to your Google Drive account.

![]() Note:
In order to successfully access LINE data in your Google Drive, your
account authorization is required. So, please disable the two-step
verification of your account.
Note:
In order to successfully access LINE data in your Google Drive, your
account authorization is required. So, please disable the two-step
verification of your account.
Next, log in to your LINE account. Open the LINE app on your phone and choose to scan the QR code or enter your LINE account manually.

Enter the authorization code in AnyRecover on your mobile phone.

Once your account has been authorized, LINE data will be automatically downloaded from your Google Drive to your computer. How long this process takes depends on the size of the data and the speed of the network.

Step 2: Preview and Recover LINE Data
Connect the Android device you have just authorized to LINE to your computer using the cable and click Next. Then wait for AnyRecover to analyze the data.

You can preview all the recoverable data and then select the LINE data you need and recover it to your device or computer.

If you choose Recover to PC : Click the Recover to PC button, select the file format and location you want to save, then click OK to export your LINE data from your Google Drive backup to your computer.

If you choose Recover to Device : Click the Recover to Device button to connect to the target device you want to recover LINE data to on your iPhone or Android and then click Start. AnyRecover will automatically restore LINE backup data from Google Drive to your phone.

![]() Note:
If the target device for recovery is Android, you will need to follow
the instructions to install an older version of LINE.
Note:
If the target device for recovery is Android, you will need to follow
the instructions to install an older version of LINE.
Mode 3: Recover from iTunes Backup
Step 1: Load and Analyze Data
When you enter the Recover LINE Data from iTunes, the program will scan and load your iTunes backup data. You can see the information of every backup. Choose a backup and click Next to analyze the backup file. AnyRecover will analyze the backup you choose. When it's done, you can preview the data.

Step 2: Preview and Recover Data
If you choose Recover to PC: Click Recover to PC directly and choose the format and location to save LINE backup file.

If you choose Recover to Device : For iOS: Once you have successfully connected, click Start, the restoration will then begin.

Once the progress bar has finished, you will see the following screen, indicating that you have successfully restored the LINE data from your iTunes backup to your iPhone.

For Android: Once you have connected your Android device, click Start to automatically download and install the old version of LINE. Your phone will be restarted then. Don’t worry, this won’t affect your data.

Enter the password of your backup encryption on your Android device and tap Restore My Data, enter the same password on your computer then and click Done.

Wait for AnyRecover to install the latest version of LINE, then log in to the same LINE account to restore your LINE data backed up in iTunes to your Android phone.


Mode 4: Recover from History Records
Step 1: Load and Select Backup Database
The program automatically loads the history record. Select the one you want to recover and click Next to proceed.

Step 2: Preview LINE Data
You can preview your backup files, then select the LINE data you want to restore and click Recover to Device or Recover to PC.

Step 3: Recover LINE Data
If you choose Recover to PC : Select the file format and path you want to save the restored data, then click OK.
If you choose Recover to Device: Once you have selected the backup file, follow the on-screen instructions to connect the device to your PC and click Start.

Log in with the same LINE account on the device from which you want to restore LINE and click on Done. Recovery will start automatically.

![]() Note:
Once you have logged into LINE on an eligible device, all LINE data
on that device will be erased.
To recover LINE data to Android devices, you will need to install an
older version of LINE. Just follow the on-screen instruction. This won’t
affect any existing data.
Note:
Once you have logged into LINE on an eligible device, all LINE data
on that device will be erased.
To recover LINE data to Android devices, you will need to install an
older version of LINE. Just follow the on-screen instruction. This won’t
affect any existing data.
WhatsApp Recovery
To get started Whatsapp data recovery, there are four modes for choice:
1. Recover from Device Storage
2. Recover from Google Drive
3. Recover from iTunes
4. Recover from History Records
You need to select a mode according to your situation. The following steps will show you how to recover WhatsApp data.

Mode 1: Recover WhatsApp Data from Device Storage
Select the "Recover WhatsApp Data from Device Storage" mode, with which you can find all local data and recover recent data records.

Step 1: Connect Device to Computer
Connect your device to the computer via USB cable. Please allow the "USB debugging" on Android device or hit "Trust this computer" on iPhone/iPad when these pop-up windows prompt. Before you click the "Start" button, you can choose where to save the device data.
Step 2: Scan Device Data
Then we move on to the scanning process. The following steps differ according to your device model (iOS or Android device).
Depending on your operating system, you can choose:
For Android Device
AnyRecover starts to scan and fetch your device data, which will be stored to History Records, so that you can retrieve these data someday even when your device is completely reset. When the scaning completes, hit "Next" to proceed.

To analyze the database, AnyRecover need you to grant the permission. First, AnyRecover will load the files to prepare the environment for data analysis.

Then you need to enter the country code and phone number of the WhatsApp database you choose. WhatsApp will send an SMS messgage to verify your phone number.

When the verification process completes, AnyRecover will calculate the related keys to analyze the database.

Finally, the program will analyze the database you choose. After that, you can directly head to Preview and Recover Data.

For iOS Device
Select the WhatsApp type you want to recover data from. Then hit "OK" to proceed.

AnyRecover starts to access your device data. This information will be analyzed by the program afterwards.

Step 3: Preview and Recover Data
All recoverable data will be shown as the images displayed below. You can choose to recover these data to your handset or computer.

If you click the "Recover to PC" option, you need to select the file format and where to save it. Hit "OK", and then AnyRecover will export the file to the location you choose. Export time depends on the size of file and speed of network.

If you choose "Recover to Device", you need to make sure your iOS/Android device is recognized by the computer. Click "Start" to proceed.

For Android Device
In order to recover the data to your device, AnyRecover will install an old-version WhatsApp on your device.
![]() Note:
WhatsApp data on the target device will be erased
after the recovery. Therefore back
up WhatsApp first if necessary.
Note:
WhatsApp data on the target device will be erased
after the recovery. Therefore back
up WhatsApp first if necessary.
The installation of the old-version WhatsApp begins. In case of unexpected failure, you should unlock your device and follow the instructions.

AnyRecover will process the files.

Shortly, your data will be recovered. Log into your WhatsApp account and you'll see the recovered data. After login, make a local backup and update WhatsApp to the latest official version.

For iOS Device
Note*: WhatsApp data on the target device will be erased after the recovery process finish. Therefore backup your data first.
First of all, Find My iPhone has to be turned off. Then Hit "OK" to proceed.

Follow the instructions to turn off your iPhone's Find My iPhone feature.

Then go to App Store to download the WhatsApp App.

AnyRecover will start to process the files. Shortly, your device will restart and your data will be recovered.

Mode 2: Recover WhatsApp Data from Google Drive
Step 1: Log In Google Drive and Access Data
Choose "Recover WhatsApp Data from Google Drive", and then log in your Google Account.

Authorize your Google account so that this program can have access to your Google Drive data. Make sure your two-step verification is off before the authorization.

Next, AnyRecover will load your Google Drive data. You can download the file to your computer. According to the size of the data, and your network speed, the process is fairly fast.

Step 2: Scan Google Drive File
To analyze the database, AnyRecover need you to grant the permission. First, AnyRecover will load the files to prepare the environment for data analysis.

Then you need to enter the country code and phone number of the database you choose. WhatsApp will send an SMS messgage to verify your phone number.

After your information is verified, AnyRecover will calculate the related keys to analyze the database.

Finally, the program will analyze the database you choose.

Step 3: Preview and Recover Data
All recoverable data will be shown as the images below. You can choose to recover these data to your handset or computer.

Recover to PC
When You Should Choose " Recover to PC"? : If your computer had crashed or is not able to boot up in an ideal way, then you can choose this mode. You need to select the file format and where to save it. Hit "OK", and then AnyRecover will export the file to the location you choose. Export time depends on the size of file and speed of network.

Recover to Device
Choosing this way, AnyRecover will install an old-version WhatsApp on your device, follow the instructions to proceed.Note*: WhatsApp data on the target device will be erased after the recovery process completes. Therefore back up the data if necessary.
The installation of the old-version WhatsApp begins. In case of unexpected failure, you should unlock your device and follow the instructions.

AnyRecover will process the files. Shortly, your data will be recovered. Log into your WhatsApp account and you'll see the recovered data. After login, make a local backup and update WhatsApp to the latest official version.

Mode 3: Recover WhatsApp Data from iTunes Backup
Step 1: Load and Analyze Data
When you enter this module "Recover WhatsApp Data from iTunes ", the program will scan and load your iTunes backup data.

Then you can see the information of your device. Click "Next" to analyze the backup file.

AnyRecover starts to anaylze the data. When it's done, you can preview the data.

Step 2: Preview and Recover Data
All recoverable data will be shown as the images below. You can choose to recover these data to your handset or computer.

Recover to PC
If you click the "Recover to PC" option : you need to select the file format and where to save it. Hit "OK", and then AnyRecover will export the file to the location you choose. Depending on the size of file and speed of network, the export takes time accordingly.

Recover to Device
If you choose "Recover to Device" : you need to make sure your device is recognized by the computer. Click "Start" to proceed.

Fist of all, Find My iPhone has to be turned off. Follow the instructions to turn off your iPhone's Find My iPhone feature.
Note*: WhatsApp data on the target device will be erased after the recover. Therefore back up the data first.

Then go to App Store to download the WhatsApp App.

AnyRecover will start to process the files. Shortly, your device will restart and your data will be recovered.

Mode 4. Recover WhatsApp Data from History Records
In this module, AnyRecover does not even need to scan your device storage, Google Drive or iTunes backup. You can recover your data that previously stored in AnyRecover.
Step 1: Load and Select Database Backup
The program automatically load the history record on AnyRecover. Select the one you want to recover and click "Next" to proceed. Besides, you can encrypt these records and only you can recover the data. If you don't want these data to be kept in the program anymore, click the "Bin" log to delete them.

Step 2: Analyze Backup Data
Then we move on to the scanning process. The following steps differ according to your device model (iPhone/Android).
For Android Device
AnyRecover starts to scan and fetch your device data, which will be stored to History Records. This way you can retrieve these data someday even when your device is completely reset. When the scaning completes, hit "Next" to proceed.
To analyze the database, AnyRecover need you to grant the permission. First, AnyRecover will load the files to prepare the environment for data analysis.

Then you need to enter the country code and phone number of your chosen database. WhatsApp will send an SMS to verify your phone number.

After your information is verified, AnyRecover will calculate the related keys to analyze the database.

Finally, the program will analyze the database you choose. After that, we can directly head to Preview and Recover Data.

For iOS Device
AnyRecover starts to access your historical backup data, which will be analyzed by the program afterwards.

Step 3: Preview and Recover Data
All recoverable data will be shown as the images below. You can choose to recover these data to your handset or computer.

Recover to PC
If you click the "Recover to PC" option, you need to select the file format and where to save it. Hit "OK", and then AnyRecover will export the file to the location you choose. Depending on the size of file and speed of network, the export takes time accordingly.

Recover to Device
If you choose "Recover to Device", you need to make sure your device is recognized by the computer. Click "Start" to proceed.

For Android Device
Choosing this mode, AnyRecover will install an old-version WhatsApp on your device, follow the instructions to proceed. Hit "OK" to continue.
Note*: WhatsApp data on the target device will be erased after the recover. Therefore back up the data first.

The installation of the old-version WhatsApp begins. In case of unexpected failure, you should unlock your device and follow the instructions.

Shortly, your data will be recovered. Log into your WhatsApp account and you'll see the recovered data. After login, make a local backup and update WhatsApp to the latest official version.

For iOS Device
Fist of all, Find My iPhone has to be turned off. Please note that WhatsApp data on the target device will be erased after the recover. Therefore back up the data first. Hit "OK" to proceed.
Follow the instructions to turn off your iPhone's Find My iPhone feature.
Then go to App Store to download the WhatsApp App.
AnyRecover will start to process the files. Shortly, your device will restart and your data will be recovered.
Ai Repair Corrupted Files
AnyRecover AIRepair is designed to repair corrupted, blurry, pixelated, unsupported photos ,videos and files. Apart from file repairing, AnyRecover AIRepair can also enhance or restore old photos with ease. It's very simple and convenient to use. Here is a tutorial on how to fix any broken files by AnyRecover AIRepair. Read on to see how it works.
![]() Note:
AIRepair standalone application is now online, and supports video, photo, and file repair for Windows, click the following "Free Download" button to download AIRepair. If you need to enhance photo quality, please download AnyRecover as usual.
Note:
AIRepair standalone application is now online, and supports video, photo, and file repair for Windows, click the following "Free Download" button to download AIRepair. If you need to enhance photo quality, please download AnyRecover as usual.
Part 1. Video Repair
Step 1: Choose Video Repair
Click the "Video Repair" mode, then choose "Add video" button. Now the repair tool supports MP4, MKV, FLV, MXF, AVI, MTS and M2TS video formats. It can also repair several videos of different formats at the same time.
Once the uploading process is finished, you will get the file name, size, length and resolution of the damaged videos on the user interface.

Step 2: Start to Repair Video
When the repair process is done, a pop-up window will show that your videos have been repaired successfully, and it's optional to save the videos on your computer.

Step 3: Save the Repaired Video
Now you can save all the repaired videos by clicking on "Save" or "Save All". Also remember to choose the storage path before finally save the videos.

If your damaged video still cannot be repaired : please fill the problem report and send the damaged video to us through email. Or you can contact our customer service, we will try our best to help repair your damaged videos.

Part 2. Photo/Picture Repair
Step 1: Choose Photo Repair
Click on the picture icon or "Photo Repair" to upload pictures need to be repaired. Now Photo Repair supports JPG, JPEG and GIF photo formats. It can repair several photos of different formats at the same time.
Many problems can be fixed including pixelated or grey image, and wrong colors also. Once loaded, you will see the thumbnail and other information of the photo, such as the size, resolution, etc.
Step 2: Start to Repair Photo
Click on "Repair" and wait till the process is done. It will inform you the result after the whole process.

Step 3: Finish Photo Repair
Save the repaired photos to the place you want after successfully repairing the photo.

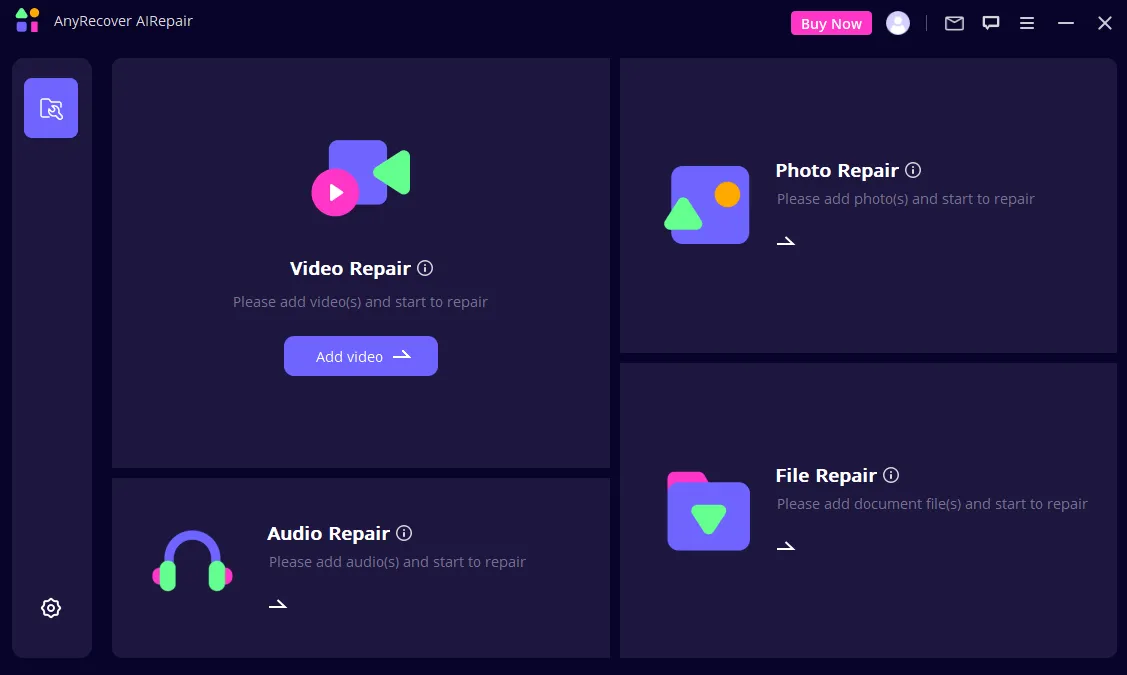
Part 3. File Repair
Step 1: Start to File Repair
In the main interface of AnyRecover AIRepair, select the "File Repair" onscreen. It will open a browser window and take you to where the corrupted file was saved. You can select multiple documents and load them into AIRepair.
![]() Note:
You can load multiple documents of
different formats and repair them at the same time through AIRepair's
batch processing feature.
Note:
You can load multiple documents of
different formats and repair them at the same time through AIRepair's
batch processing feature.
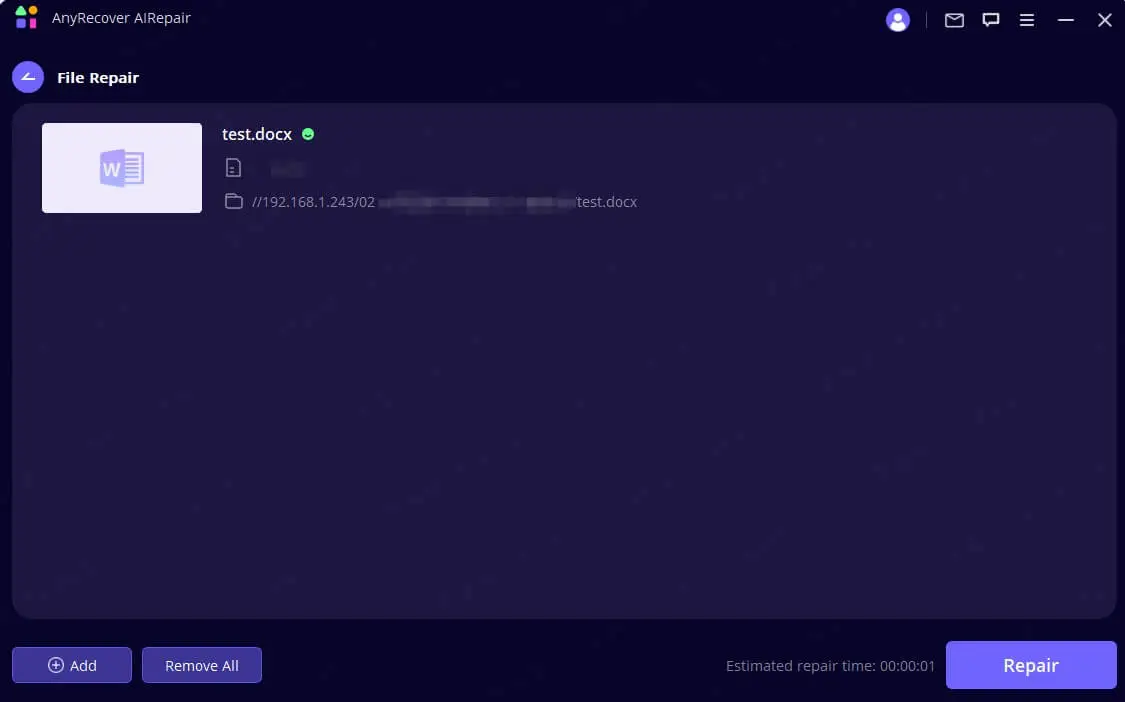
Step 2: Start File Repair
When you select Word, Excel, or PowerPoint files from your PC, the program will load them and display the progress on the screen.
![]() Note:
If you uploaded the wrong file, you can
delete it by clicking the trash can icon next to its details. You can also
delete all files at once by clicking the "Remove All" button at the
bottom.
Note:
If you uploaded the wrong file, you can
delete it by clicking the trash can icon next to its details. You can also
delete all files at once by clicking the "Remove All" button at the
bottom.
Step 3: Finish File Repair
The application will scan the loaded document and fix various minor or major issues. And you can pause the repair process at any time.
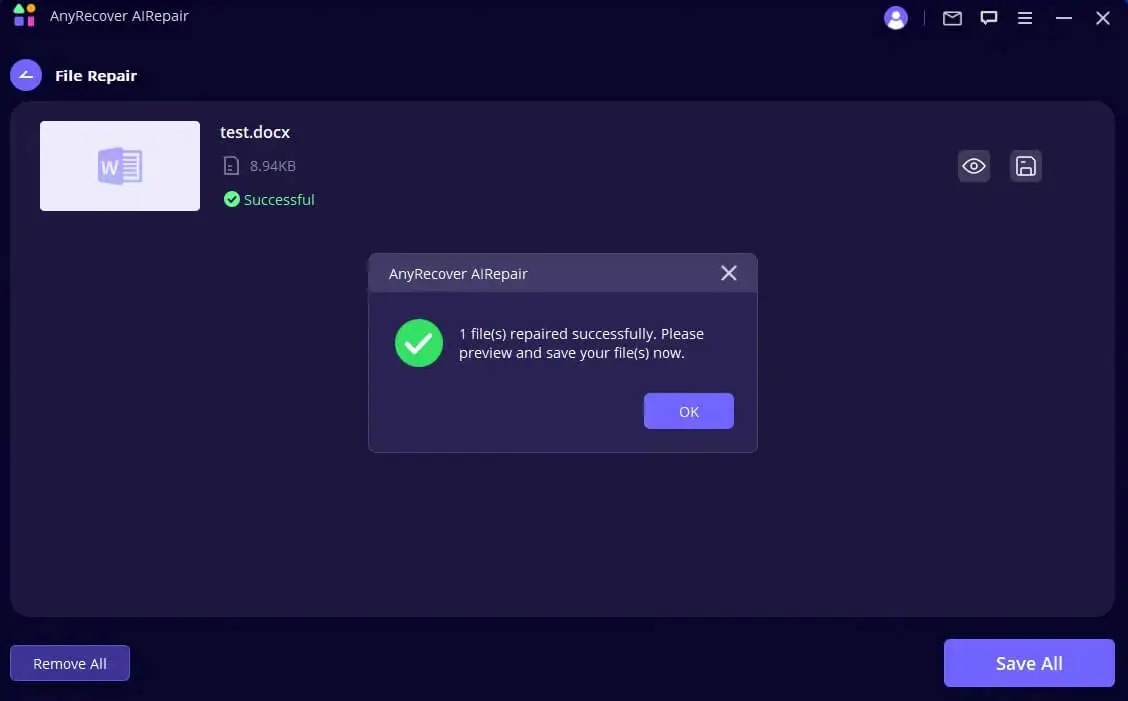
After the file repair process is complete. A pop-up message will appear informing you of the repair results. A successfully repaired file will have a "Success" sign below it.
However, if the document is excessively damaged and has not been repaired, you can contact us by clicking "Feedback" in the menu bar on the interface. Send your severely damaged file and describe the current situation to get expert help.
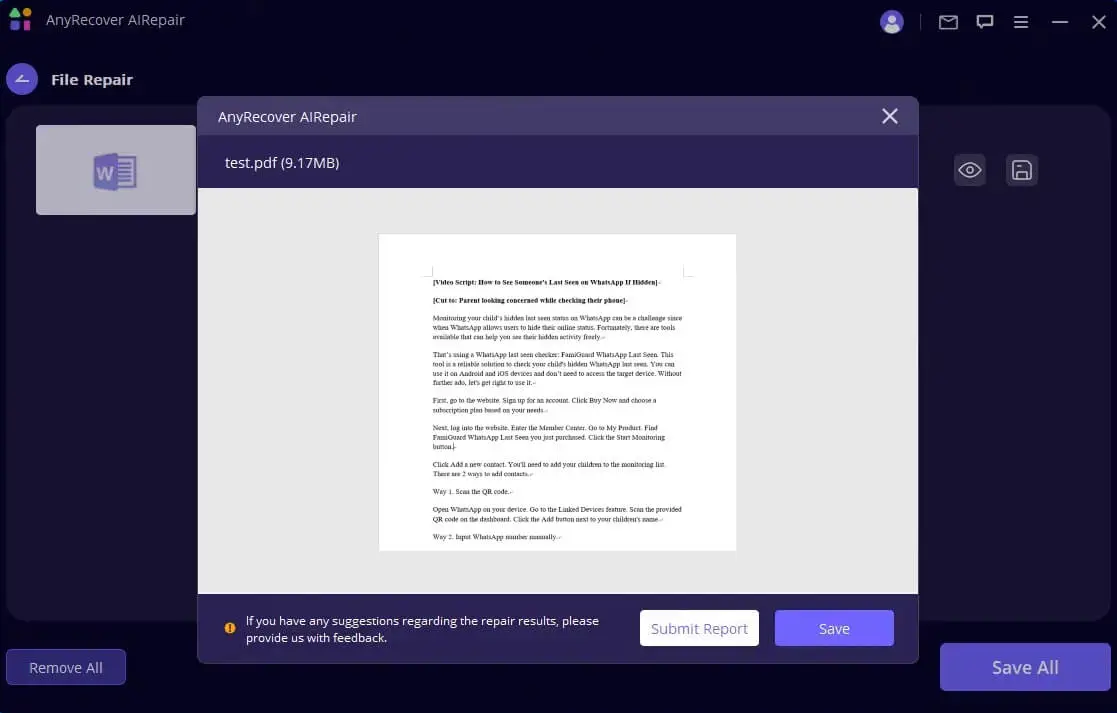
Step 4: Save the Repaired File
Once the repair process is complete, you can click the "Save As" button at the bottom or save a single file. Then you can go to the path where the repaired files are saved on your Windows PC and access them.
Part 4. Enhance
Step 1: Select Photo Clarity
Open AnyRecover, select Photo Clarity button.

Step 2: Select the Image to Start Enhancing Blurry Photo
Select the photo/image from your PC, the program will load them and display the progress on the screen.

Step 3: Successful Clarify Photo
After a while, your blurry photo/image will be clear. Then you can save the enhanced photos.
