- Data Repair
- Data Recovery
-
Tips
-
 Hard Drive Recovery
-
Photo/Video Restoration
-
 Deleted Files Recovery
- Guide
- Support
- Shop
-
Search
- Store
[2024] How to Fix Recuva Failed to Scan the Following Drives

![]() James
James
“I accidentally deleted a file and when I tried Recuva to get it back, I kept seeing the error Recuva failed to scan the following drives, how do I fix this?”
When we delete a file only to realise moments later that we actually need it, a few thoughts race through our minds. First, there’s the question of whether it can be recovered from the Recycle Bin, but larger files skip this and are completely deleted. Recuva is a solution which reverses the deletion of a file, but it doesn’t always function properly. Users who experience Recuva failed to scan the following drives can find out everything they need to know in this guide.

1. Why Does Recuva Fail to Scan the Following Drives
Why does this error occur? There can be hundreds of reasons, but these are the most common Recuva error types:
Ran Out of Memory: Computers use RAM (Random Access Memory) when a program is running and it’s very typical of software that scans your storage to use lots of memory. If Recuva can’t obtain more memory then it won’t successfully retrieve deleted data.
Device is Not Ready: If the storage drive you are scanning is abruptly disconnected or a similar program is running a scan on it, Recuva will consider it not ready.
Unable to Determine File System Type: Every file on a computer is structured using a file system; different computers use different file system types. If Recuva isn’t familiar with the file system then it will fail to scan it.
Invalid Drive Size: Data recovery tools rely on lost data not being overwritten. So, if the hard drive is at max capacity, deleted files are likely gone or there isn’t any space for recovery.
These 4 reasons are among a pile of others, but it’s likely one of these applies to your situation. It’s also worth remembering that the problem could be with your computer or the operating system, not necessarily Recuva.
2. How to Fix Recuva Failed to Scan Problem
Now let's check how to repair the problem that Recuva failed to scan the following drives. Although some reasons are easily fixable – a lack of available storage can be resolved by deleting some unnecessary files – there will frequently be cases where more abrasive solutions are needed. The unfortunate fact is that there is no official fix for this particular Recuva error. However, there are plenty of fixes which are recommended by users who have previously experienced it.
Try Scanning Non-Deleted Files
Step 1. Run the Recuva program and enable Advanced Mode.
Step 2. Go to Options and navigate to the Action section.
Step 3. Click the Scan for non-deleted files button.
Running this scan will exclude deleted files from the scan and this will put less strain on the recovery tool’s performance. However, this won’t always do the job and fix the drive problem.
Disable Sleep Settings
Computers try to conserve power and Windows does a good job of this, especially when it comes to storage. If you or the system doesn’t access a hard drive’s data within a certain timeframe then it’ll be put into sleep mode. This also applies to some USB devices. Although it sounds like energy-saving, it can cause data recovery software errors like Recuva failed to scan the following drives. Thus, you may fix the issue by disabling the sleep settings.
Step 1. Open the Device Manager.
Step 2. Expand Universal Serial Bus controllers and right-click USB Root Hub (3.0).
Step 3. Select Properties and go to the Power Management tab.
Step 4. Uncheck Allow the computer to turn off this device to save power.
Step 5. Click OK to confirm the change and repeat this with any other USB Root Hub devices that are listed.
Step 6. Next, search and open the Power Options menu.
Step 7. Click Change plan settings next to your plan, then Change advanced power settings.
Step 8. Disable the USB selective suspending settings and change the Turn off hard disk after variable to 1440 minutes. Click Apply and OK.
Perform a scan again and if this fixes Recuva then fantastic. Otherwise, you can change all of these settings back to ensure the computer doesn’t waste energy.
Perfom a Quick Format
Some Recuva users say in the forum that performing a quick format of the device and try again can solve the issue "Recuva failed to can the following drives". Here are the detailed steps to do it.
Step 1. Ensure your external storage device is connected to the computer and then choose This PC.
Step 2. Find your drive and right click it. Select Format in the menu.
Step 3. Choose the NTFS and mark the box in front of Quick Format.
Step 4. Confirm your action by clicking Start.
Step 5. After finishing format, try Recuva again to scan for non-deleted files as mentioned above.

Please bear in mind that there will be nothing on your drive after you quick format it. But the previous data are still stored in the disk space. Don't plug the drive into other devices. And you need to run Recuva to see whether the issue has been solved. If the result it positive, restore the files as soon as possible.
Open Recuva in Safe Mode
Safe mode makes a program run without unnecessary additions. This could be plugins, extensions, add-ons, or even custom themes – most programs offer something in-line with these.
After putting your PC in Safe Mode, you can run the Recuva and see if the drive is detected. If so, either disable any additions or reinstall Recuva to recover lost data.

A Safer and Easier Way to Recover Lost Data
Maybe you want to avoid dealing with Recuva’s error altogether and use a safer, easier, and more reliable recovery solution instead. AnyRecover fits this description completely. With the advanced techonology applied, it can recover your lost data with a extremely high success rate. And the uer-friendly interface can turn you into a tech-savvy in data recovery.
Key Features:
- Recover over 1000 different file types, including photos, videos, audios, documents, emails, and many others.
- Detect any storage devices you connect to the computer, such as the hard drives, USB flash drives, SD cards, SSDs, cameras, etc.
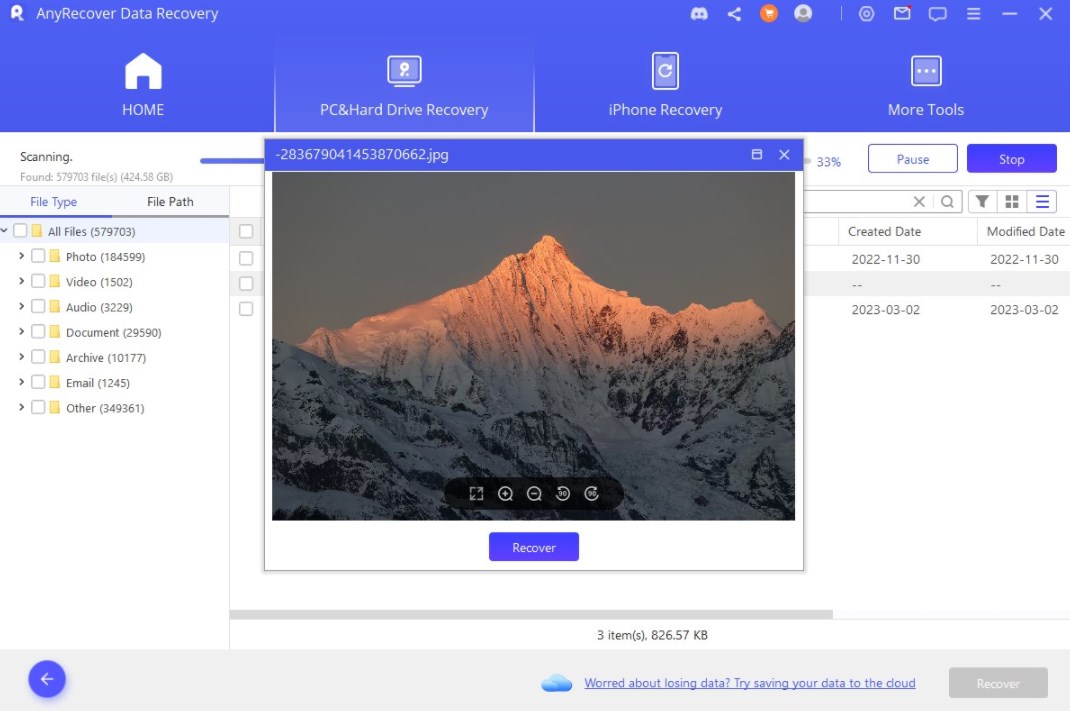
- Preview function is enabled for you to check and recover the file accurately.
- User-friendly interface requires no tech knowledge to recover the lost data by yourself.
- Safely recover files without corrupting the originals.
Evidently, this data recovery has much more to offer, and runs much smoother too, than Recuva does. To recover lost data with this program use the steps we’ve detailed below.
Make sure you have download, install, and launch AnyRecover.
Step 1. If you encouter partition problems, go for "I can't find my partitions".

If your driver and system work normally, choose a partition that you want to recover.

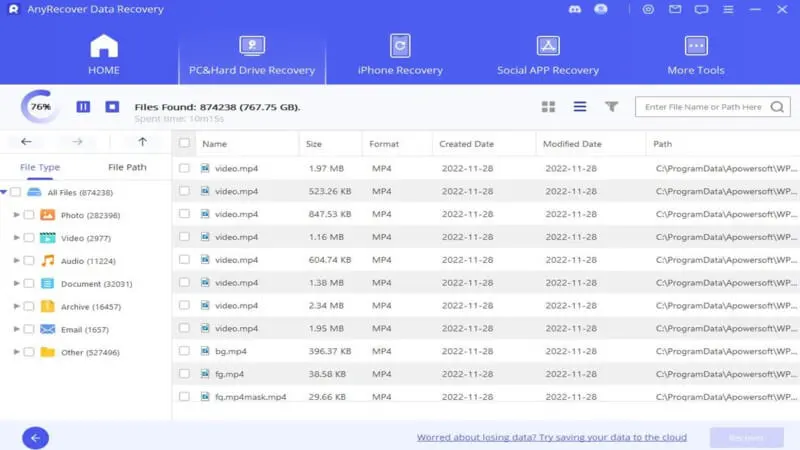
Step 2. Wait for a few moments till the scan is complete, and you can pasue or stop during the process.
Step 3. Once the scan finishes, browse the results and choose "Recover". Select a folder that you wish to store the recovered files. Be sure to choose a folder different than the folder the files were originally stored.
This is the only sure-fire way to recover data safely and there won’t be any problem when scanning your drives either. AnyRecover doesn’t disappoint users because it is equipped with so many features. It’s suited for virtually any data loss situation.
Conclusion
Everything we’ve explained in this article will assist you when Recuva failed to scan the following drives, and you’re left with two choices. Either continue with Recuva and attempt to fix this error or move on and use AnyRecover without having to struggle with that problem. Our recommendation is the latter simply because AnyRecover offers an impressive arsenal for data recovery.
Recover Data from PC/Phone
Looking for a reliable data recovery tool without scanning errors? Look no further than AnyRecover! It is the best data recovery program for recovering files after formatting, wiping, partition loss, disk damage, virus attacks, and more.
Related Articles:
Rated successfully!
You have already rated this article, please do not repeat scoring!
![]()
![]()
![]()
![]()
![]()
![]()
![]()
![]()
![]()
![]()
![]()
![]()
Copyright © 2026 AnyRecover. All rights reserved.
Time Limited Offer
for All Products
Not valid with other discount *