- Data Repair
- Data Recovery
-
Tips
-
 Hard Drive Recovery
-
Photo/Video Restoration
-
 Deleted Files Recovery
- Guide
- Support
- Shop
-
Search
- Store
How to Recover Lost Audio Files From Computer

Audio files play a significant role in the media matrix andplenty of people use them for diverse need ranging from entertainment to education. During the useof audio files, however, sometimes things can go wrong and you end up losingthem. Some of the common situations where you can lose audio files include: deletion of music file library from your computer, accidental formatting of a disk that contains your audio files, malware attack on your drive that ends up corrupting your disk, abrupt interruption while copying audio files between devices.
Losing audio files, especially those you value the most inyour computer can be upsetting. Luckily, there are several ways to recover lostaudio files from computer with ease. In this article, we shall guide you on howto do that.

Part 1. Recover Lost Audio Files From Recycle Bin
For Windows System
Whenyou delete audio files or any other files on your Windows computers, they aretemporarily stored in the Recycle Bin for a certain period. Depending on yoursetting, this period can be 1 day, 14 days, 30 days, 60 days or forever. Thereforewhen you accidentally delete some audio files, you can easily retrieve them aslong as they haven’t been emptied from the recycle bin automatically ormanually.
Step 1. Double-click the Recycle Bin icon toopen it on your computer.
Step 2. When the Recycle Bin opens, find thedeleted audio files that you want to restore.
Step 3. Right-click on the audio file and clickthe "Restore" option. If you have several audio files to restore, simply selectthem and head to the "Manage" tab then hit the "Restore the selected items" options.

Wait for the Windows computer to restore these files. You should be able to find them in their original save location once the recovery is complete.
For Mac System
Just asWindows stores deleted files in Recycle Bin, Mac stores deleted files in Trash.You can retrieve deleted audio files from the Trash provided the storing periodhasn't expired, which is 30 days.
Step 1. Click the Trash icon on your Mac toopen it.
Step 2. Lookfor and locate the audio files that you want to retrieve from Trash bin.
Step 3. When you find the target audio file, just right-click on it and choose the "Put Back" option.

You can verify whether the audio files are indeed recoveredusing Finder. Just open Finder and search for the original file location. If you cannot see the file in that location, maybe you might have changed the output path. Also you can make use of Spotlight or more advanced features like Siri to verify that.
Part 2. Recover Lost Audio Files Using AnyRecover
Lost/deleted audio recoverycan be complicated depending on the circumstance of loss. Thisimplies that choosing a reliable recovery method is highly important, in viewof time and energy cost. AnyRecover is areliable audio recovery softwareused by a great number of people andinstitutions. This program allows users to retrievefiles practically in any file format with speed and ease. Whether it is audio, video,image, document, and emails, you can recover them with simple and easy steps –nobody needs to be tech-savvy. AnyRecover is available for both Mac and Windows and you can download it for free or buy the affordable premium versions.
AnyRecover's Key Features:
- AnyRecover is specially designed to recover over 1000 different file formats of photos, videos, documents and emails, etc.
- Advanced data scanning algorithms. Data scanning speed of AnyRecover is blazing fast, allowing you to scan and look for hidden files quickly.
- User-friendly software interface which is suitable for beginners. Help you recover deleted data easily.
- AnyRecover offers a FREE Trial with 8 files for free recovery with no size limit. You could also preview your data before recovering it. You could also preview your data before recovering it.
- Supports Windows 11/10/8/7/XP and MacOS.
The following steps highlight how to recover lost or permanently deleted audio files using AnyRecover
Step 1. Download, install and launch AnyRecover on your computer. Select a location from which you want to recover the lost audio files.

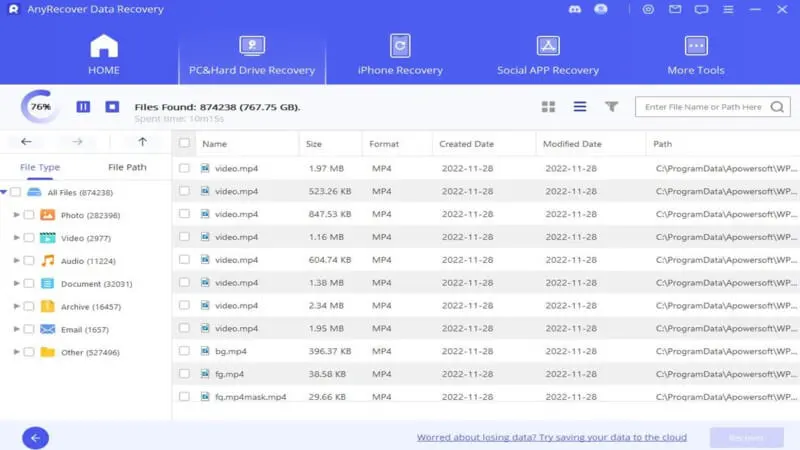
Step 2. Now the program will start the scanning process. Wait patiently for it to finish.
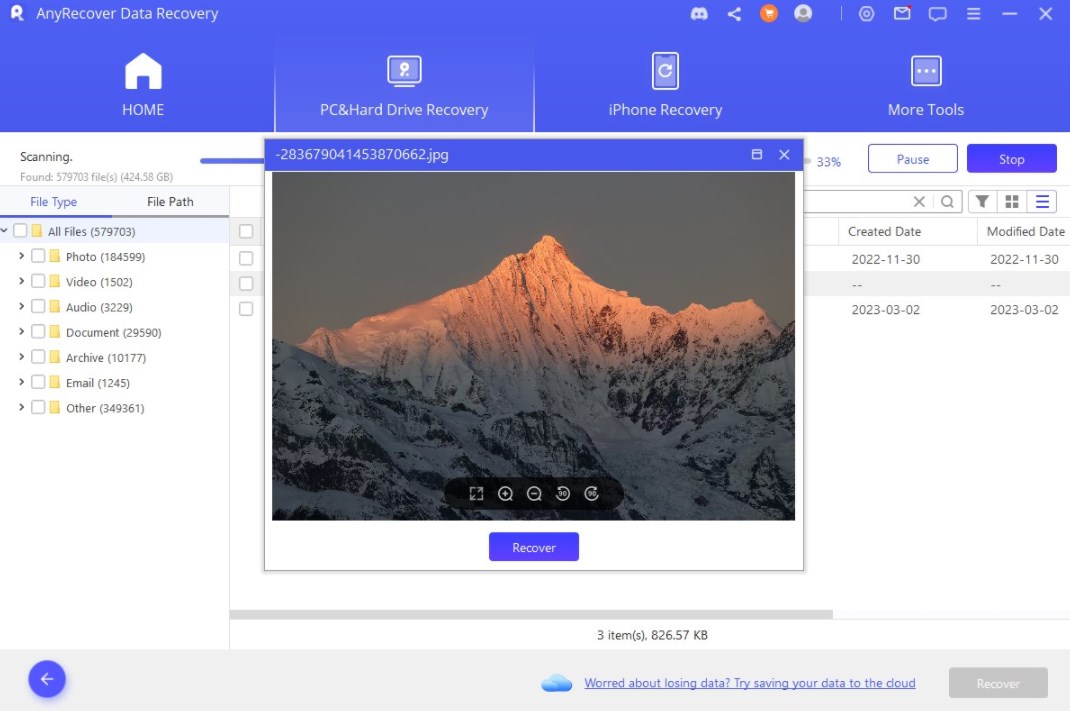
Step 3. When the scanning is done, you can see all the recoverable files displayed on the screen. Choose what you want to preview and click on "Recover" to get them back.
Conclusion
Whether youare using Mac or Windows systems, this guide has simplified everything you needto know about as far as recovering lost audio files from computer is concerned.While trying the methods, you'll find that AnyRecover is truly "king of thejungle". The ever-growing usage is a testament toexcellent user satisfaction. Try this program and put an end to annoyingdeleted/lost audio file recovery issues.
Related Articles:
Rated successfully!
You have already rated this article, please do not repeat scoring!
![]()
![]()
![]()
![]()
![]()
![]()
![]()
![]()
![]()
![]()
![]()
![]()
Copyright © 2026 AnyRecover. All rights reserved.
Time Limited Offer
for All Products
Not valid with other discount *