- Data Repair
- Data Recovery
-
Tips
-
 Hard Drive Recovery
-
Photo/Video Restoration
-
 Deleted Files Recovery
- Guide
- Support
- Shop
-
Search
- Store
2024 Ultimate Guide on How to Use TestDisk on Windows & Mac

Data loss is a common issue, whether it"s because of accidental deletion, virus/malware attack, system crash, hardware failure, or some other reason. Fortunately, most of the time data recovery is possible. You simply need to use the right data recovery tool.
When it comes to data recovery tools, TestDisk is a popular name among many users. But this tool is too complicated to use for beginners, here we"ll show you how to use TestDisk on Windows and Mac computer.
What Can TestDisk Do for You?
Like some of the best data recovery software on the Internet, TestDisk is a free powerful data recovery tool that has been designed to help users recover deleted data, lost partitions, make non-booting disks bootable again, and more. Available for both Windows and Mac, TestDisk has a command line interface and it is capable of recovering a wide variety of files.
1How to Use TestDisk On Windows 11/10/8/7
Using TestDisk to recover deleted files/folders may seem like a lengthy and complicated process, but if you follow the steps right you will come to find that recovering deleted files via this tool is not as difficult as it seems.
Follow these instructions to use TestDisk on Windows:
Step 1. Launch TestDisk on your computer. Once it is launched, press Enter.
Step 2. Select Create option and press the Enter button. TestDisk will scan for connected hard drives.

Step 3. Once you see the list of hard drives, use the arrow keys to select the disk that you want to scan and press Enter.

Step 4. On the next screen, choose the partition table type (Intel) and continue by pressing the Enter button.

Step 5. Now select Analyze and press Enter. TestDisk will start analyzing your selected hard drive.

Step 6. Once the analysis is complete, use the Quick Search option to scan the drive.

Step 7. Now you will see the list of lost/deleted files. From that list, navigate to the files/folders that you want to recover and press the "C" button to copy them.
Step 8. Next, select the destination folder to copy your files and press "Y" to start the copying process. TestDisk will copy the selected files to the folder where it is running from. Once all the selected files are copied, you will see a "Copy Done!" message on the screen.
2How to Use TestDisk On Mac
The process to use TestDisk to recover deleted files on Mac is quite similar to the process on Windows with few differences.
Follow these instructions to use TestDisk on Mac:
Step 1. On your Mac, launch the Terminal program.

Step 2. Once the Terminal is launched, input sudo TestDisk to recover files from a hard drive and press Enter.

Step 3. Next, choose No Log option and press Enter to continue.

Step 4. You will see a list of connected hard drives. Select the hard drive that you want TestDisk to analyze and press Enter. To choose the partition that you want to scan, select it and press P.

Step 5. Next, choose EFI GPT option if you have the recent Apple Mac or Mac if you have an old PPC Mac and press Enter.

Step 6. After that, select Analyze and press Enter. Next, perform a Quick Search.

Step 7. Once the scanning is complete, you will see the list of lost/deleted files. You can browse the files and folders via the arrow keys of your keyboard. Navigate to the files/folder that you want to recover and press C to copy them. You will need to copy files/folders one by one.
Step 8. When you press C to copy the file/folder, TestDisk will ask you the location to copy the selected data. Simply navigate to your desired folder and press Y. The copying process will begin.
If everything goes right, your selected file/folder will be copied to your desired destination. You can then navigate to that folder to view those files. If the copying process is taking too long or seems to be stuck, then you can always quit TestDisk by pressing the Q button.
3An Easier and Higher Success Rate Recovery Software
If you are looking for a more user-friendly option to recover your deleted files, then it is recommended that you give AnyRecover a try. This software has a user-friendly interface that is suitable for beginners. You can use AnyRecover to recover all types of files quickly and conveniently.
AnyRecover Key features include:
- Recover all types of files: photos, archives, videos, documents, emails, etc.
- Recover deleted files from any storage medium: hard drive, external hard drive, SD card, digital camera, etc.
- Clear and user-friendly software interface makes recovery as easy as possible.
- Extremely high successful data recovery rate - up to 98%.
- Supports both Windows OS (including the latest Windows 11) and Mac OS.
Comparison of TestDisk and AnyRecover
Features | TestDisk | |
|---|---|---|
Deep Scan |  |  |
Trash/Recycle Bin Recovery | | |
Preview Data | | |
Multiple Files Recovery | | |
External Devices Recovery | | |
Lost Partition Recovery | | |
Scan Specific Path | | |
Scan Specific File Type | | |
Raw Recovery | | |
Easy to Use | | |
Steps to Recover Lost Files
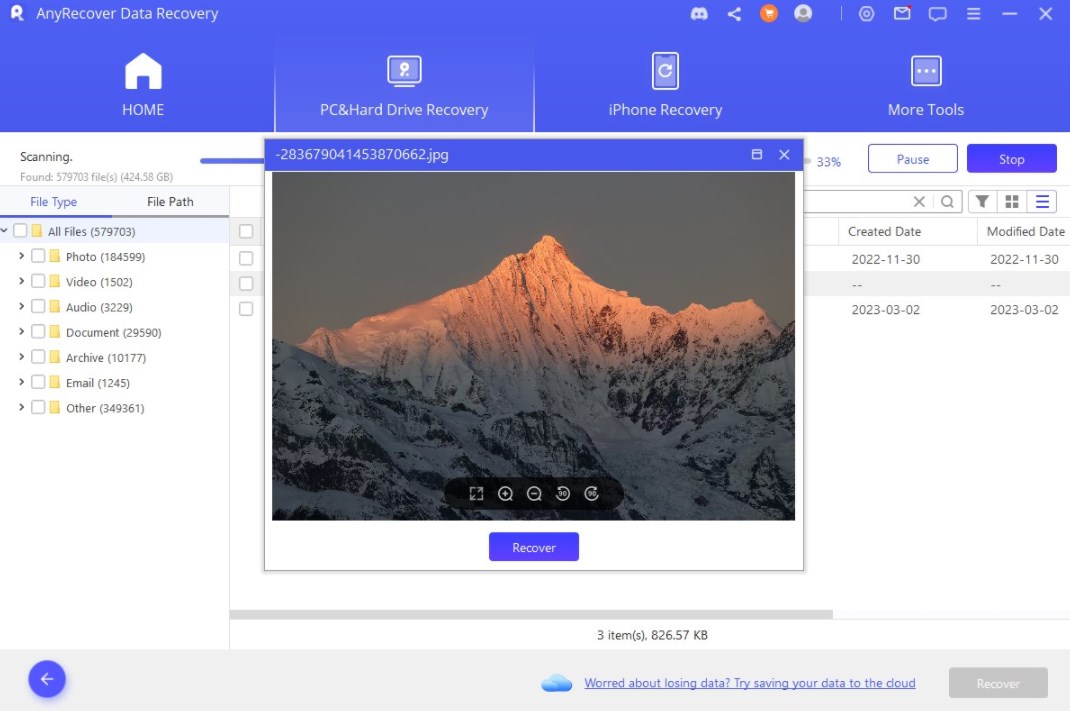
Step 1. Open AnyRecover on your computer then select the location where you want to recover files from.

Step 2. Click on "Start" to begin the process, you can pause to locate your desired files or stop it during the scanning.
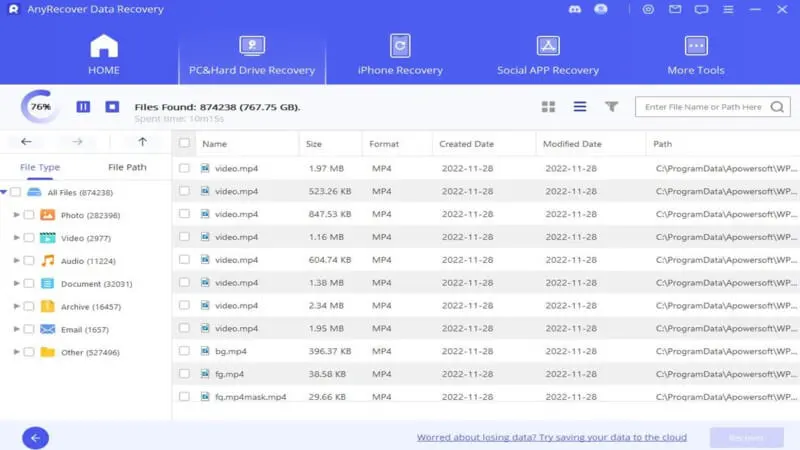
Step 3. Preview your lost files, select those you want to restore then click on "Recover".
Conclusion
TestDisk is a powerful free data recovery tool that is capable of recovering all kinds of deleted data. However, this software is not easy to use as it has a command line interface. If you are looking for a user-friendly alternative that is just as reliable, then AnyRecover is a recommended option for you.
Related Articles:
Rated successfully!
You have already rated this article, please do not repeat scoring!
![]()
![]()
![]()
![]()
![]()
![]()
![]()
![]()
![]()
![]()
![]()
![]()
Copyright © 2026 AnyRecover. All rights reserved.
Time Limited Offer
for All Products
Not valid with other discount *