Top 5 Ways on How to Recover Unsaved Word Document on Mac
If you lose power when you are in the middle of working on a Word document with your Mac, or your Mac crashes all of a sudden, all your unsaved Word files may disappear. You might be terrified that you have to start the work from scratch again – luckily we have good news for you. There are ways to recover the unsaved Word document on Mac quickly and easily. And in this article, we will show you how to do that. Read on to check the details!
-
Solution 2: Recover Unsaved Word Document on Mac From the Temporary Folder
-
Solution 3: Recover Unsaved Word Document on Mac With AutoRecovery
-
Solution 4: Restore Lost/Deleted Word Documents on Mac With Time Machine
-
Solution 5: Ultimate Way to Recover Unsaved/Deleted Word Document on Mac With AnyRecover
Solution 1. Recover Unsaved Word Document on Mac in Trash
Word for Mac saves documents temporarily in the Trash folder. Therefore you can check Trash in the first place to see if the unsaved Word document is there. Once you open the Trash, you may be able to find your unsaved file in the Recovered items folder. Below, we have the steps you need to follow:
Step 1: Open the Trash.
Step 2: Locate a folder called Recovered items. Double click on the folder to open it.
Step 3: In the folder, try to locate your unsaved Word file. Move it to another location, open it and continue working on it.
This method is really easy and convenient but does not always work. If you cannot find unsaved Word document in Trash, then try the next solution.
Solution 2: Recover Unsaved Word Document on Mac From the Temporary Folder
Usually Microsoft Word for Mac saves temporary files in a folder called TemporaryItems. When you try to recover unsaved Word document on Mac, follow the steps below to see if you can find it in the temporary folder:
Step 1: Go to Applications > Utilities and then double-click on the Terminal.
Step 2: In the Terminal, type open $TMPDIR and then hit the Enter button. This should redirect you to the TMP folder.
Step 3: In the TMP folder, locate a folder called TemporaryItems and open it. Locate the unsaved Word document and right-click on it. Select Open With and then click Microsoft Word.
Step 4: Once the file opens in Word, you can save it by clicking File > Save As.
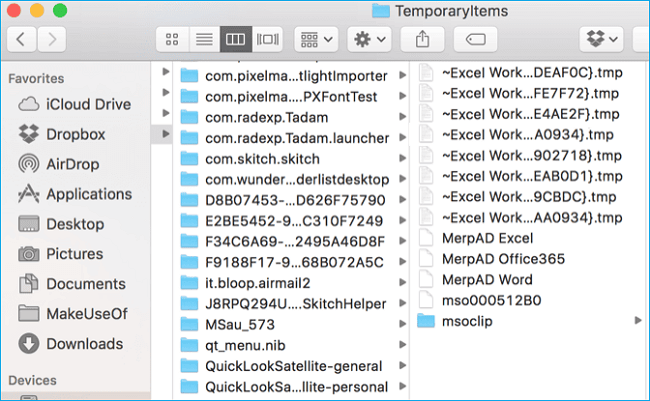
If you cannot find unsaved Word documents in the TemporaryItems folder, then it's probably because you have deleted them or cleaned up the folder.
Solution 3: Recover Unsaved Word Document on Mac With AutoRecovery
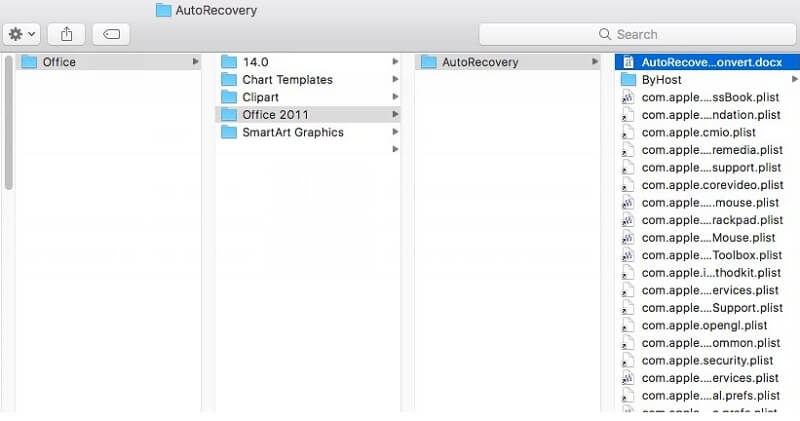
Microsoft Word has an AutoRecovery feature that is usually turned on by default. This feature saves an open document automatically every 10 minutes. To use the feature to get back your unsaved Word document on Mac, follow the steps:
Step 1: On your Mac, open Finder. Access Go > Go to Folder.
Step 2: Enter ~/Library/Containers/com.microsoft.Word/Data/Library/Preferences/AutoRecovery.

Step 3: In the AutoRecovery folder, locate the file that you would like to recover and then add the .doc extension to the file name.
Step 4: Open it with Word and save it.
Tip: How to Change the Settings of AutoRecover
Step 1: On the the Word menu, click Preferences.
Step 2: Click Save. In the Save AutoRecover info box, enter how frequently you want the program to save documents.
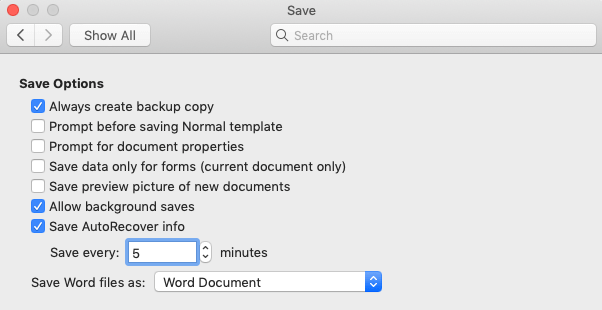
You can also change where to save AutoRecover files in Word by going to Preferences > Personal Settings > File Locations > AutoRecover files > Modify and then choose the location you like.
Solution 4: Restore Lost/Deleted Word Documents on Mac With Time Machine
If you have enabled Time Machine on your Mac computer, the feature creates a backup for everything on your computer for the past 24 hours. Therefore if you have been working on a Word document, Time Machine may already have a copy saved up for you. To access your unsaved Word file in Time Machine, you need to follow the steps outlined below:
Step 1: Use the Spotlight to locate and launch the Time Machine.
Step 2: Use the timeline to locate the lost Word document.
Step 3: Once you've found the Word document, select it and then hit the Restore button.
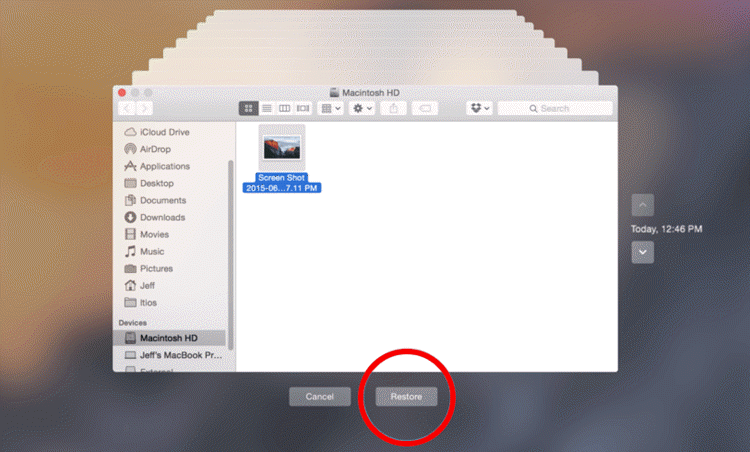
It is appliable only if you had turned the Time Machine ON before you lost Word documents.
Solution 5: Ultimate Way to Recover Unsaved/Deleted Word Document on Mac With AnyRecover
If the above methods fail to work for you, don't give up. There is an ultimate way to help recover unsaved or even permanently deleted Word document on Mac - you can still use a third-party tool known as AnyRecover to get the Word files back. As a professional data recovery program, AnyRecover makes recovery extremely easy and fast. The whole process involves just three simple steps: select, scan and recover.
AnyRecover Key features include:
- Capable of recovering Word document on Mac in various situations - accidental deletion, disk formatting or Word crashing on Mac.
- Supports over 1000 file formats, including documents, emails, archives, images, videos, pictures and audios.
- Recovers data from any storage device such as hard drive, external hard drive, and SD card on Mac.
- Enables users to preview first and then decide to recover.
- No further data loss. AnyRecover does not overwrite your currently available data.
- Compatible with all Windows and macOS versions including the Windows 11.
Steps for how to restore unsaved Word document on Mac using AnyRecover:
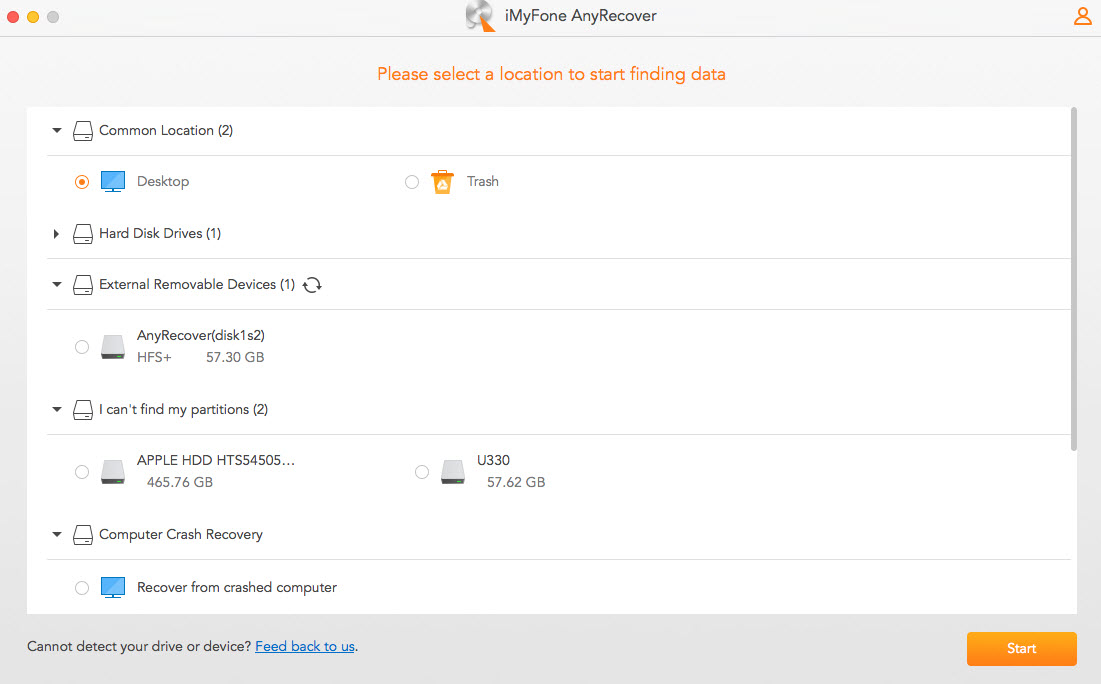
Step 1: Download, install and launch AnyRecover on your Mac. Select the location where the unsaved Word document was once stored, then hit Start.
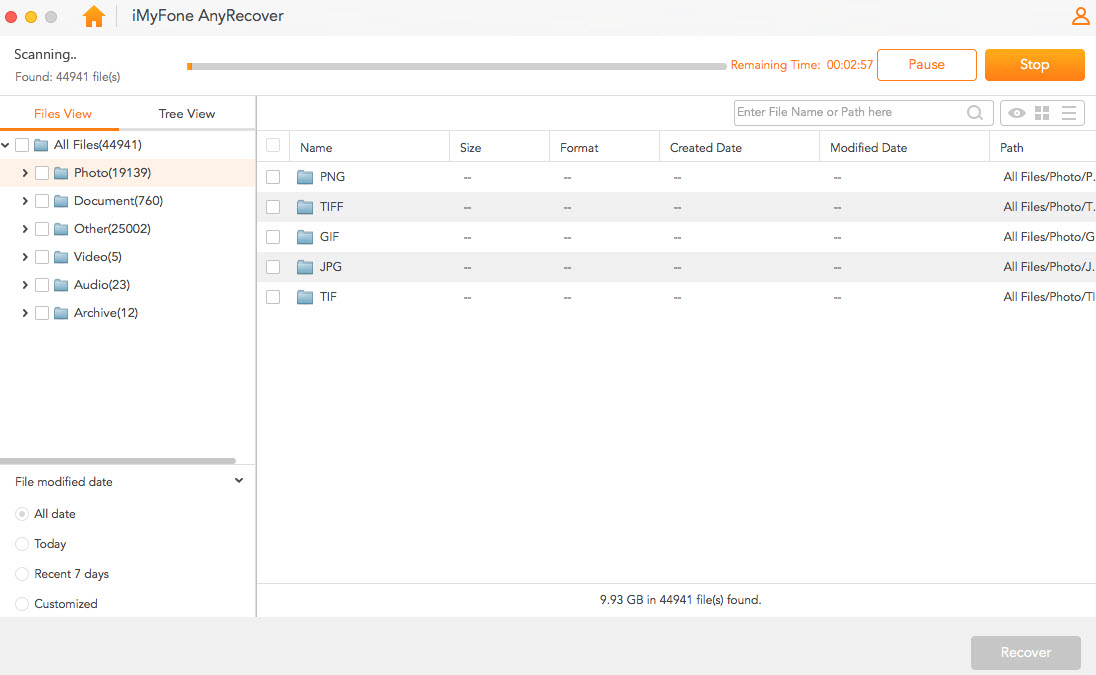
Step 2: AnyRecover will do an all-round scan for your unsaved Word documents.
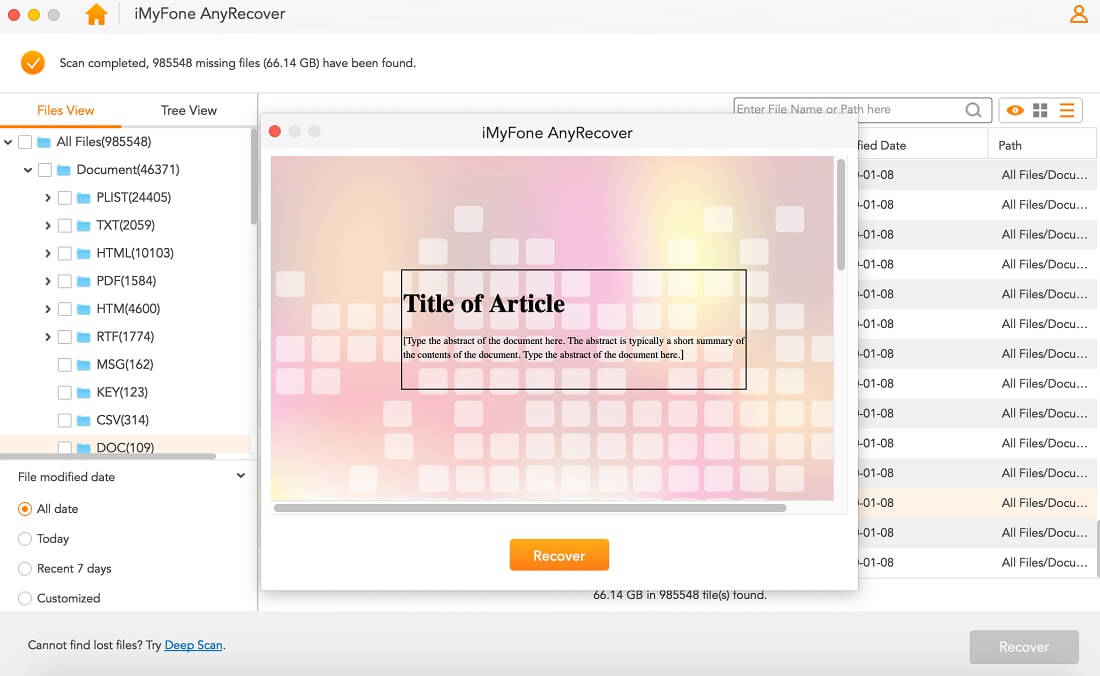
Step 3: After the scan, your lost files will be displayed. You can have a preview first, then select what you would like to get back and click Recover.
Conclusion
Even if you have lost an unsaved Word file on your Mac computer, you don't need to fret. As long as you try the solutions and steps outlined above, you should be able to get the file back. Among the 5 solutions, AnyRecover is undoubtedly the most powerful one as it can not only recover unsaved Word document, but also restore the Word file that got lost as a result of malware/virus attack, accidental deletion, hard drive formatting, OS crash/re-install, hard drive damage, etc.
Time Limited Offer
for All Products
Not valid with other discount *

 Hard Drive Recovery
 Deleted Files Recovery
