How to Post a Live Photo On Instagram
Live photos have become a trending and popular feature among iOS users. A live photo is partly a photo and partly a video. It is a 1.5 seconds motion picture with 12 megapixels. So many Instagram users enjoy uploading their live photos to share their daily life. One beautiful fact about live photos is that they are easy to create, however posting them requires some knowledge since Instagram has not provided a button to help out quickly. Thus, this article will take a detailed look at how to post a live photo on Instagram. Read on.
How to Post a Live Photo on Instagram
1. Save Live Photos as Videos and Then Post
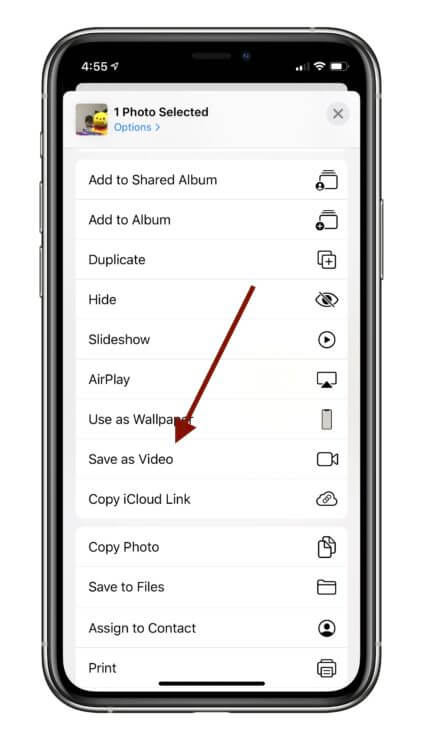
One of the easiest ways to post live photos on Instagram is by converting them to videos in the very beginning. And this can be achieved by the build-in feature of newer iPhone models. Follow the steps below to do it:
Locate the live photo that you want to post in your Photos app.
-
Tap on the Share button and then select the Save as Video option in the menu.
2. Post Live Photos via Stories
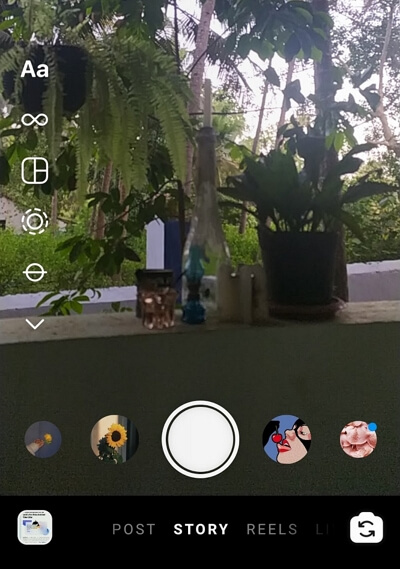
Another fast way to send your live photos to Instagram is through the Stories feature. To achieve this, you must upload live photos that have been shot within the last 24 hours. To upload photos that were shot more than 24 hours ago, you need to try other methods in this article.
You can do this by:
-
Turning on your Instagram app and tapping the camera icon in the left-hand corner to initiate a new story.
Go to your camera roll and pick out the target live photo to post (don't forget the live photo must have been captured within the last 24 hours).
3. Convert Live Photos Into Boomerang and Then Post
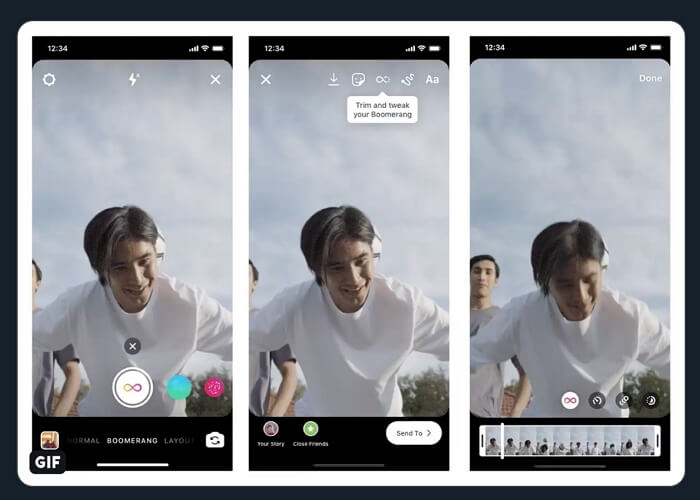
Another method to post your live photos on Instagram is by converting them to Boomerang. However, this method can only upload the live photos shot in the latest 24 hours.
How to do it:
-
Launch the Instagram app and tap the camera icon in the top left corner.
Pick out your live photo from your image library.
Firmly hold your finger against the middle of the screen until a white circle comes up and the word Boomerang pops up (this implies it has been converted into a Boomerang).
-
Then you can post the Boomerang you just created as usual.
4. Convert Live Photos Into the Bounce and Then Post
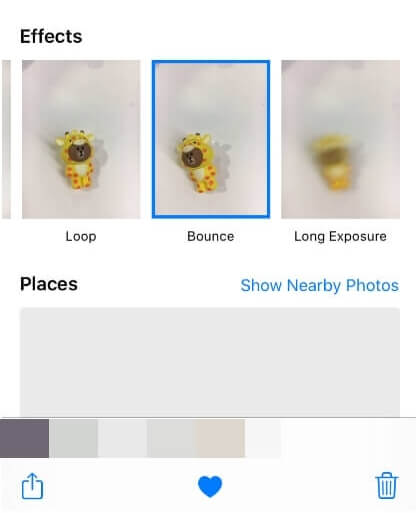
A quite common way to share your live photos on Instagram is by converting them to bounce. You can do this directly through your photo apps and then upload the result on Instagram. Here is how to do it:
-
Visit the Photos app on your phone and pick out the live photo you want to work on.
-
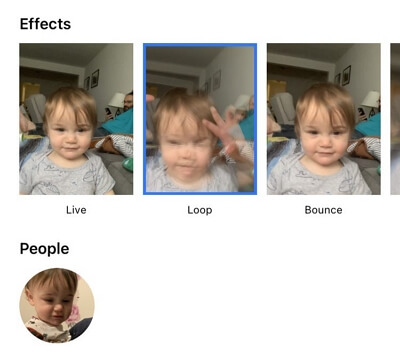
Swipe up the photo to get the Effects screen.
-
Select the Bounce option and save the image.
Now, you can upload the bouncing image as a normal Instagram post.
5. Convert Live Photos Into a Loop and Then Post
You can also turn your live photos into Loops and then upload them on Instagram. This method is similar to the last one, and you can choose any of them based on your needs and situation. To Loop your live photo, follow these steps:
-
Select the live photo on your phone and swipe up to bring out the Effects screen.
-
Choose the Loop option and preview how it looks like with this effect.
-
Once you are satisfied, tap on Save button.
Now you can open the Instagram app and upload your looped image as your normal Instagram post.
6. Convert Live Photos into GIFs
Another way to share your live photos on the Instagram App is by converting them into gifs. Gifs are quite trendy on Instagram. And you should know that though live photos capture motion, it is not the really gifs. Unfortunately, Apple develops no build-in function to convert live photos into gifs. So you need to take advantage of third-party tools.
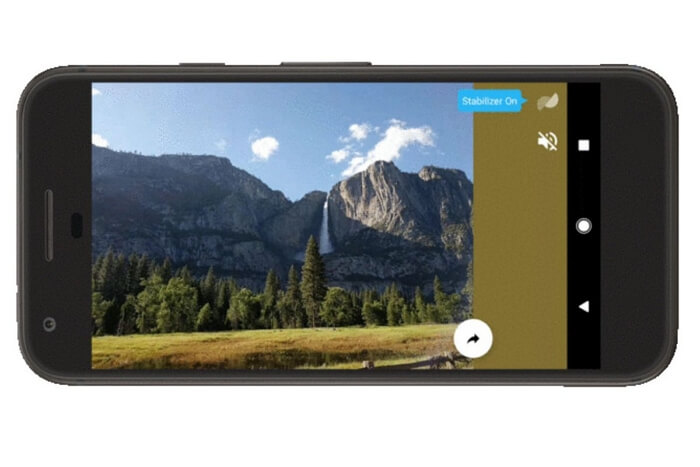
One of the best apps to convert live photos to gifs is known as Motion Stills. Created by Google, this useful app turns live photos into cinematic gifs using Google stabilization technology. Besides, you can search online to find more tools.
Conclusion
Live photos make your Instagram feeds more lively and interesting. It also makes it look authentic because you capture and share the real moments. This is why it is a great way to promote your Instagram page. With the method above, you can better understand how to post live photos on Instagram. Just check them out!
 Tip
Tip
Read more: How to Recover Deleted Instagram Messages
Time Limited Offer
for All Products
Not valid with other discount *

 Hard Drive Recovery
 Deleted Files Recovery
